Wednesday, June 24th, 2015
I have to be honest with you, dear blog readers: I really miss having platinum blonde hair. Only because I could change the color whenever I wanted to with Manic Panic, but nevertheless, I miss it. I went back to being a redhead because my hair was totally fried from all of the bleach I’d used to keep it pure as the driven snow, but I miss cotton candy pink, I miss ice queen blue, and I most of all, I miss purple. OHHHHH purple, my long-lost hair color love. How I long for the days you sat atop my head. **SOBS DRAMATICALLY**.
Although you have to bleach your hair to get pale pastel colors with Manic Panic, you don’t have to bleach your hair to use it altogether. Desperate to add some flair to my boring strawberry blonde locks, I decided to use a combination of Pretty Flamingo (a peachy pink, orangey dye) and Cotton Candy Pink dye to create some ombre/highlights/color streaks (I’m not quite sure what to call them, really). I’d tried doing streaks and highlights with Manic Panic before, and it didn’t work particularly well. But Pinterest says it’s possible! And everything you read online is true, obviously. So I took a leap of faith by trying again.
Let me take you through my process…
In an attempt to get the purest color possible, I used Shimmer Lights purple shampoo as a toner. The shampoo is supposed to take out red and yellow tones from blonde hair. I put it all over my hair and planned to let it sit for about 30 minutes. Instead, I got sucked into working on this very blog, and it ended up working it’s magic for about 2 hours. And by magic, I mean it didn’t really work. It left random patches of my hair looking gray and dull. This is step is unnecessary. But if you ever ask yourself, “what does purple shampoo do to red hair?”, then here’s your answer:
Let’s move on to the part that actually matters. Before I applied the Manic Panic dye, I washed my hair and blow dried it. You should not use conditioner before applying Manic Panic. Your hair needs to be totally clean and free of product build-up.
After it was clean and dry, I parted my hair down the middle. I separated my hair into sections and secured them into twisty little buns using bobby pins. I planned on dying most of the hair on the very top of my head with the Pretty Flamingo dye and pinned it all together. Then I randomly sectioned off the hair on the sides of my head into twists, with no real visual plan, because I live on the edge.
The hair at the back of my head towards my neck was too short to pin. From past experience, I’ve learned that the hair back there doesn’t soak up dye as quickly as the front. I applied cotton candy dye back there first. Then I pulled the sections on the side of my head out of their twists and applied either pink or peach dye, alternating colors. I finished off the application by saturating the top twist with peach dye, and a little bit of pink in my bangs.
I let the dye sit on my head for a full 2 hours. When I jumped in the shower to wash it out, I saw that the dye remnants were totally white – a sign that all of the pigment stuck to my hair.
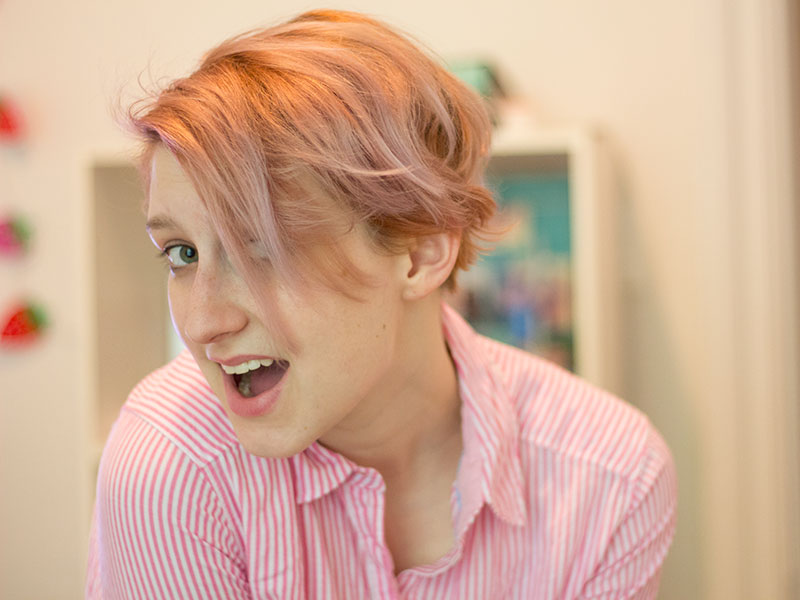
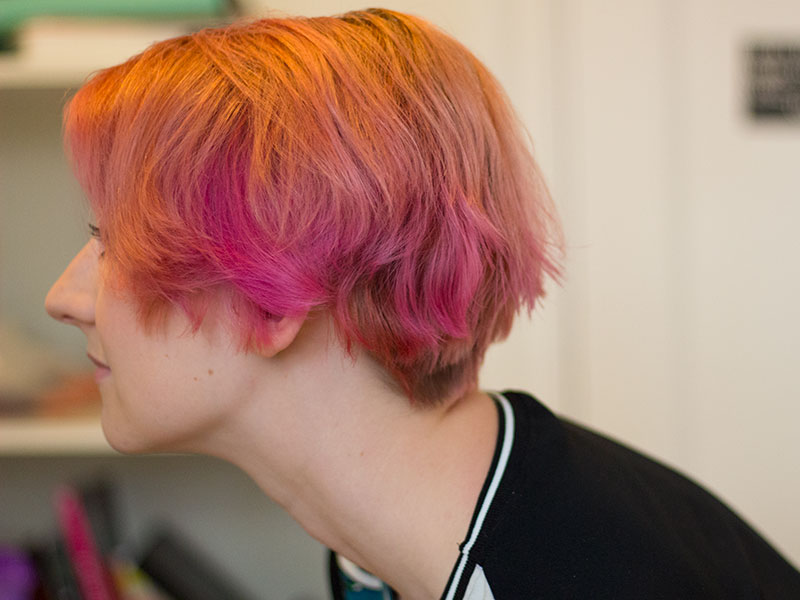
After it was dried and styled, it looked like this:
From the front it looks just a tad pink…
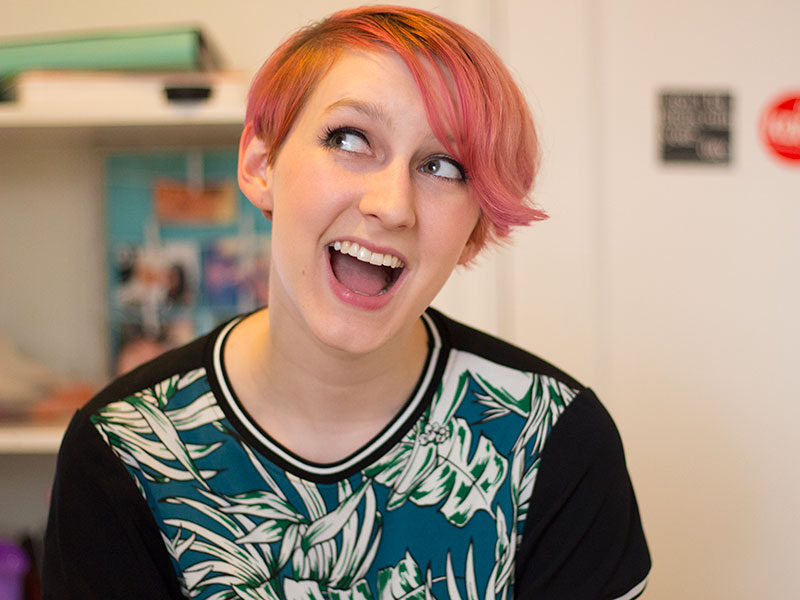
…until I turn to the side. WHA-BAM! Peek-a-boo pink realness.
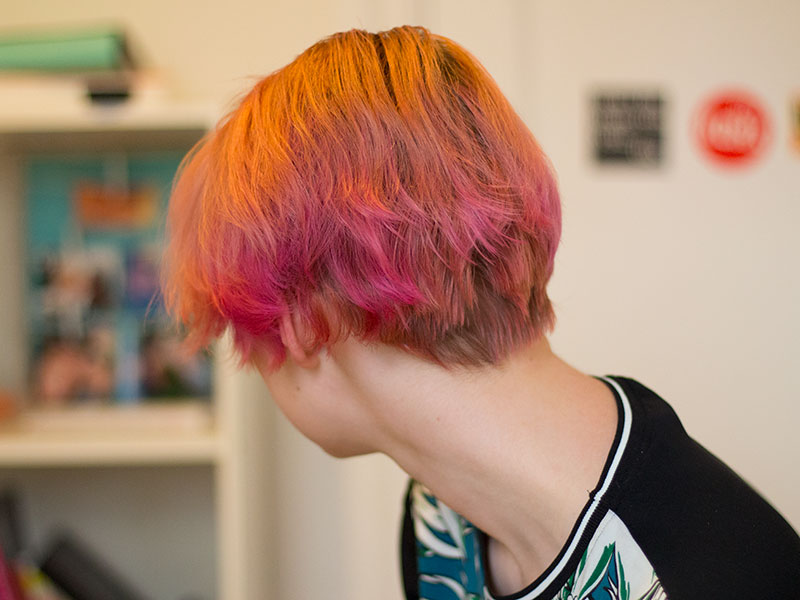
The fade in the back looks even and matches the rest of my hair.
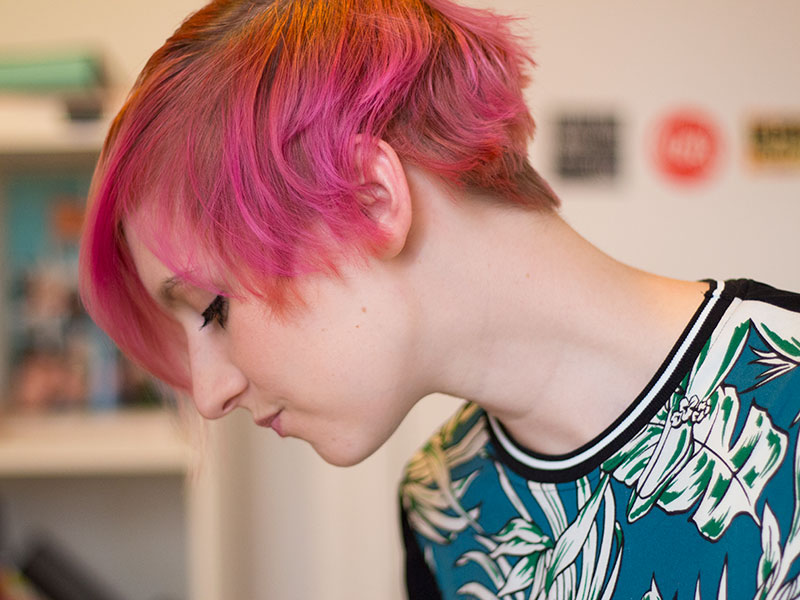
When I part it on the opposite side, you can really see the pink. I really love this vibrant pink shade. The Pretty Flamingo dye definitely made my hair a lot more strawberry than blonde, but the color isn’t stand-out neon like I had hoped. Next time I try this, I’m going to use Electric Tiger Lily dye for a more intense orange, and apply the cotton candy dye more liberally.
 Overall, I’m really happy with these results. I’m not mourning the loss of my platinum quite as much as I was before. I’m thinking this color scheme is going to become my signature look for awhile.
Let me know what you think in the comments below.
Monday, May 25th, 2015
Every time I’ve moved into a new space, I have come up with many, many grandiose ideas for how to decorate. When I was a senior in high school dreaming about my college dorm room, I spent hours online deciding which posters I would buy. When I moved into my first apartment in college, I scoured thrift stores for diamond-in-the-rough furniture and tchotchkes. My current apartment, which is also my first New York City apartment, suffered from a lack of decor for a good long while, due to the stress of moving, running a blog, working for a demanding job, etc, etc. But now that I’m moving in with my favorite girl come September, I’m back on the DIY decorating Pinterest grind. FYI…I am going to make ALL OF THE THINGS. And you know there is going to be a blog post for each and every creation.
Although I can’t get my DIY decor on just yet, here are 10 quirky and colorful DIY projects I intend on eventually carrying out.
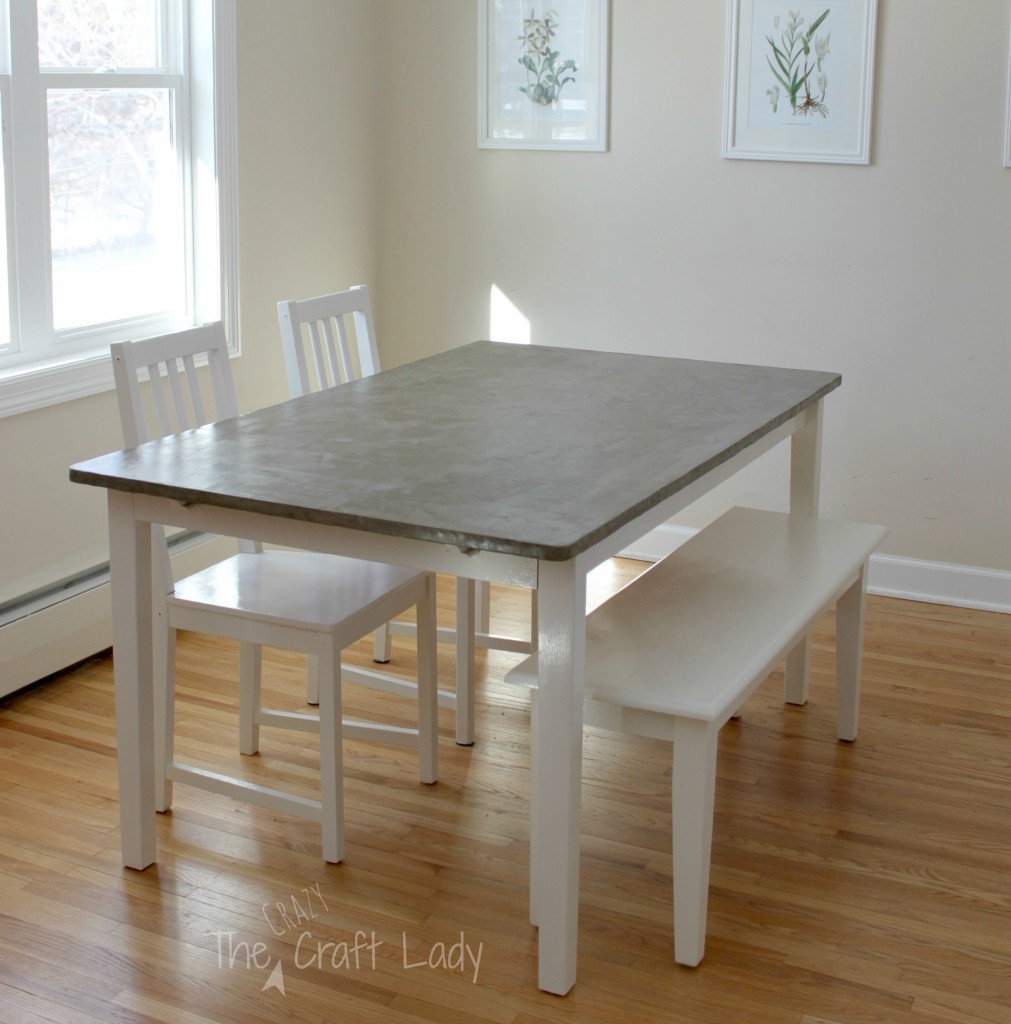
Incase you’re out of the loop when it comes to serious crafters, covering your tables in concrete is all the rage. It’s simple, it’s inexpensive, and it makes for a super sleek looking piece of furniture. Aimee of The Crazy Craft Lady covered her dining set in concrete, and I intend on following her instructions to revamp an unfinished wood end table I already have.
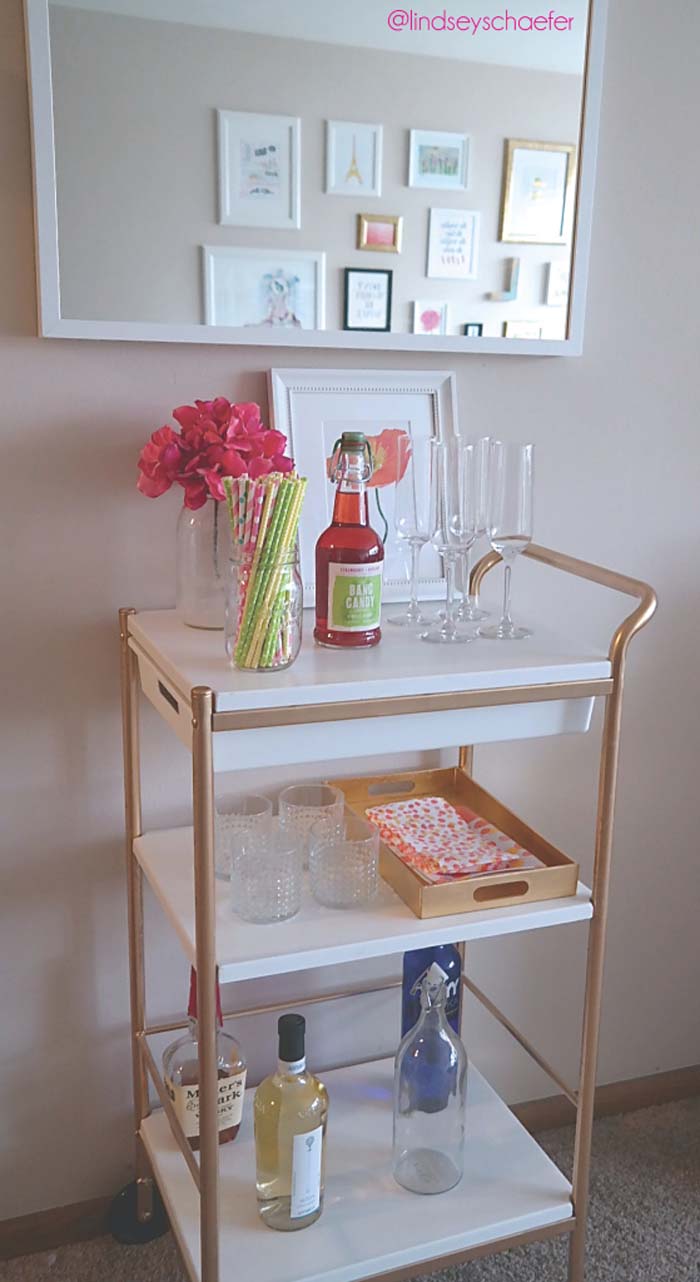
Because I intend on making my new apartment all kinds of grown-up sophisticated, I’m definitely turing this $30 Ikea utility cart into a retro-chic bar cart with some spray paint. At our housewarming party people are going to be like, “whoa. There is a bar cart in this apartment. That is some fancy shit.” You can check out the tutorial from Lindsey at The Curly Diaries.
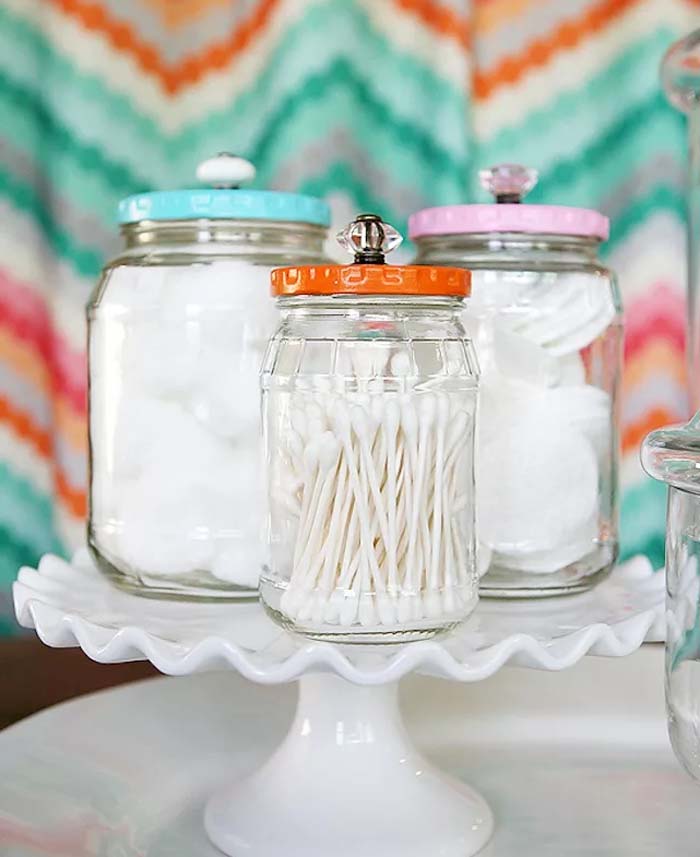
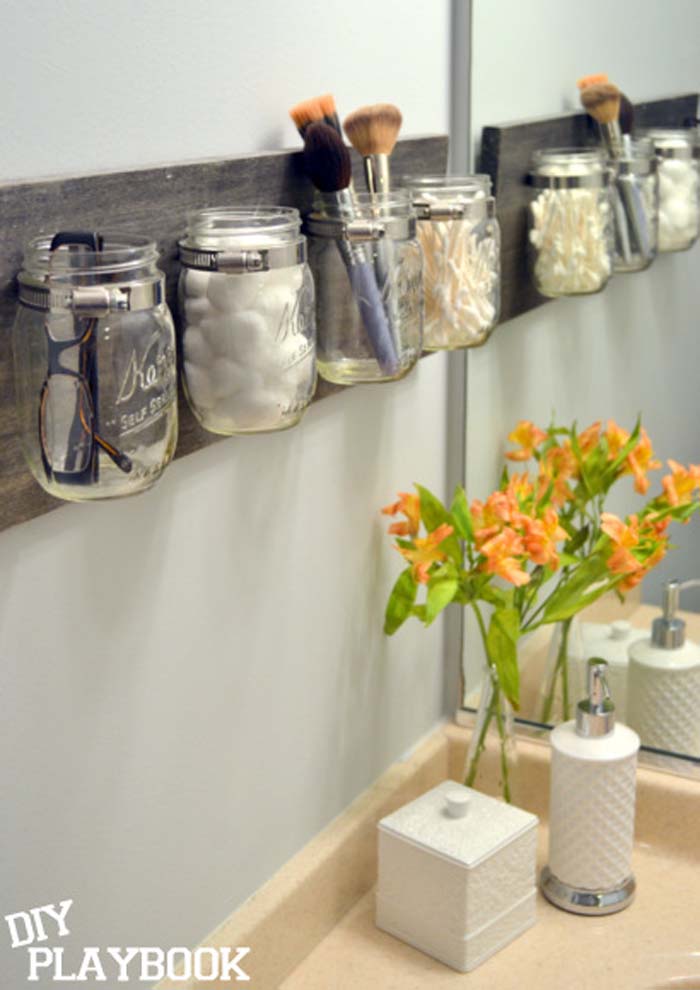
Starting now, I will be saving all of my glass jars and their lids. With a coat of rubber paint, hot glue, and a drawer pull, you can make old jars into apothecary-esque creations. The jars in this photo are used for bathroom supplies, but I’m going to use mine in the kitchen for salt, sugar, coffee, and spices.
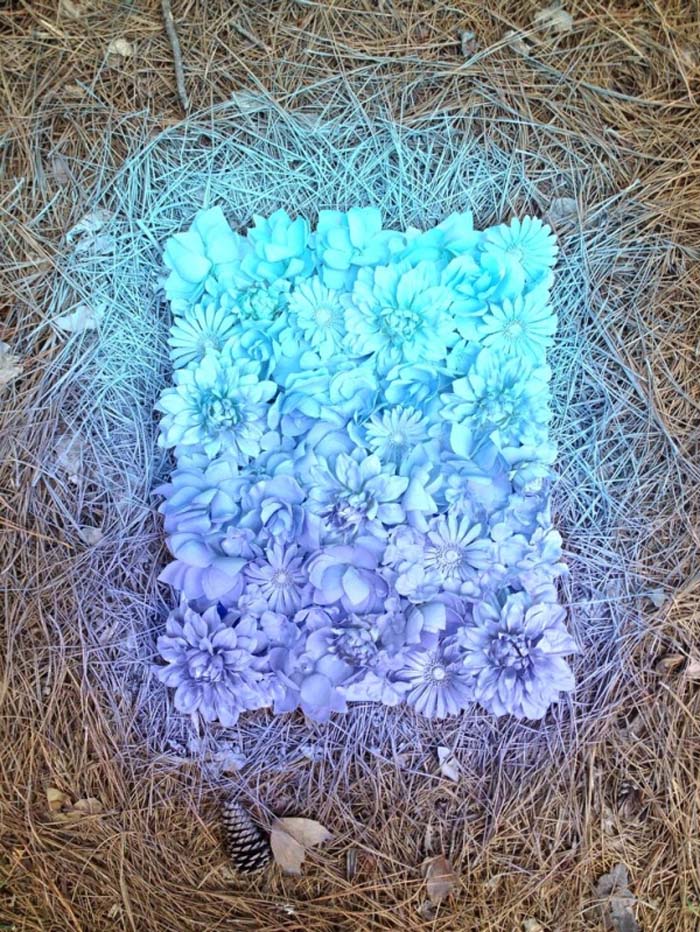
This photo doesn’t come with much of a tutorial, but it seems pretty self-explanatory. First, acquire a canvas and some fake flowers. Then, hot glue the fake flowers to the canvas. Then spray paint the shit out of it with some bright colored spray paint. Voila! It’s art. Put it in your entryway, you crafty bitch.
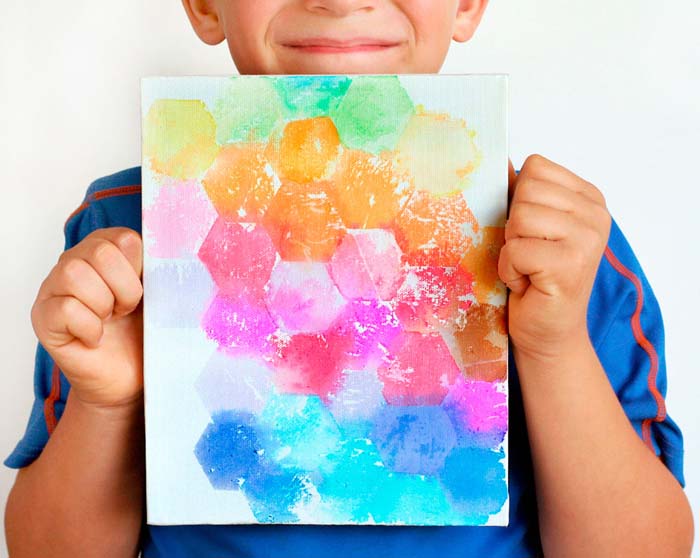
This idea from Fiskars is actually recommended for kid’s crafts, but I think it looks cool so I’m doing it for my grown-up apartment anyway. All you need is special bleeding tissue paper, which you can find at most craft stores, a white canvas and water. You cut shapes out of your tissue paper (or strips), wet the canvas, stick on your paper and then remove it after it sits overnight. So easy! So pretty! ONE-OF-A-KIND! My girlfriend claims she doesn’t like being crafty, but I am forcing her to do this with me.
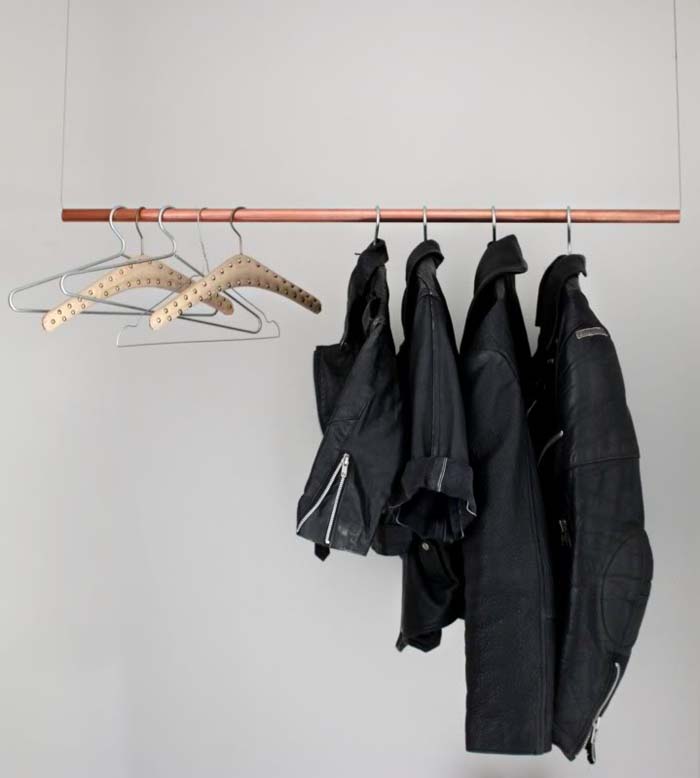
I already know that no matter how great of an apartment we end up in, there is not going to be enough closet space for two girls with a whole lot of clothing. Since I have a lot of vintage clothes I’d love to show off in a cool way, this DIY hanging coat/garment rack will be practical and sleek. The instructions are simple: get tube. Get wire cable. Get two hooks. Hang it. If you feel you need more detailed instructions, check out Love Aesthetics.
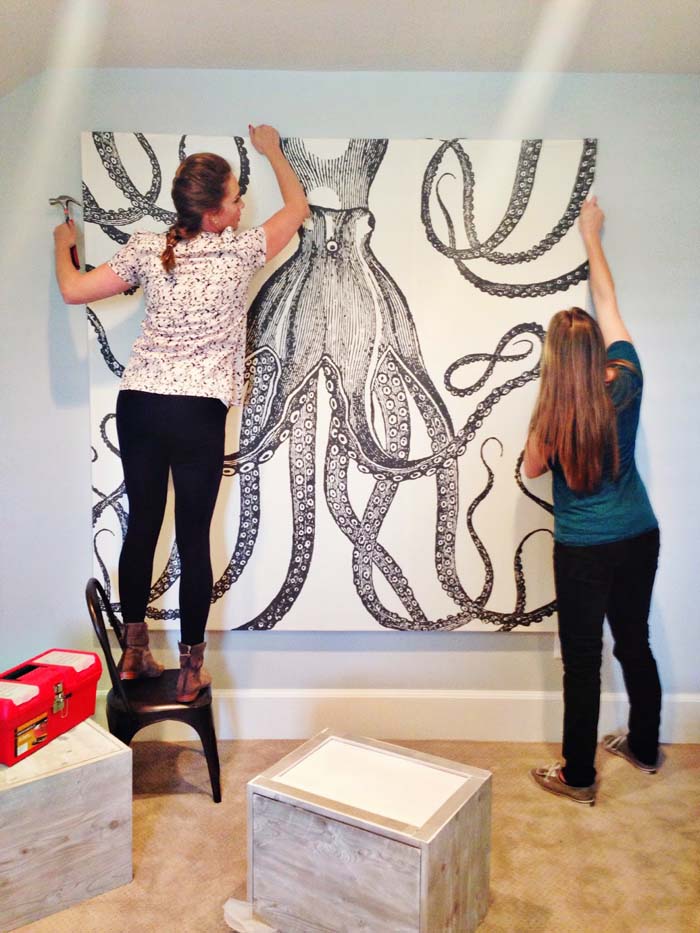
This giant piece of octopus art is actually a shower curtain, and this idea is absolutely genius. Big wall art is so expensive, but all you need to make your own is a shower curtain and some plywood boards from Home Depot. Kirsten over at 6th Street Design School says this project only took her and hour of work. I say YAAAAAAAS to everything about it.
Not only will we have a fuck ton of clothes in our new apartment, we’re also going to have a whole lot of makeup. This mason jar bathroom organizer is not only easy to make, but it will also be easy to clean with a quick swipe of a Clorox wipe. You can read the whole tutorial over on The DIY Playbook.
I’m not sure how I feel about using Christmas lights for this project, but I’m thinking I’ll use wiry string lights like these instead. I’ll also paint the hula hoop gold and use gold wire to hang it from the ceiling instead of lace like Sarah from Sarah With An H did. I’d rather have a sleek chandelier than a shabby-chic one, but to each their own.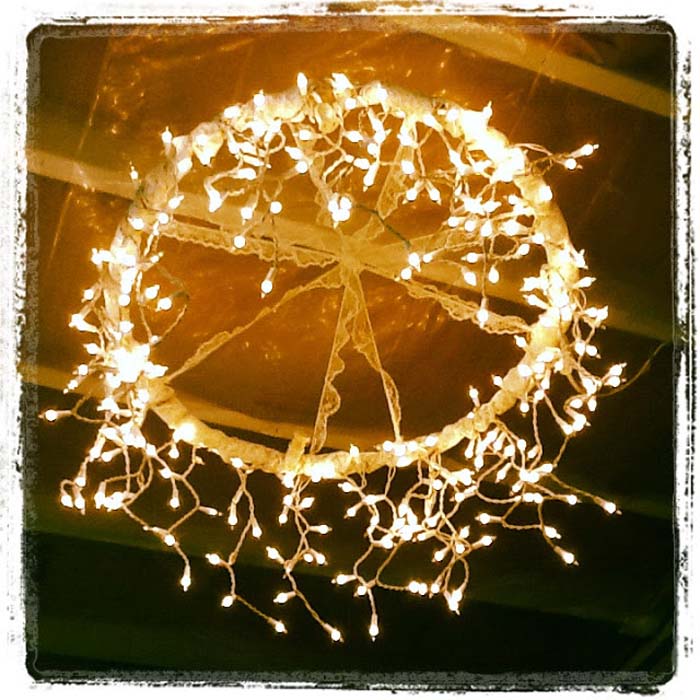
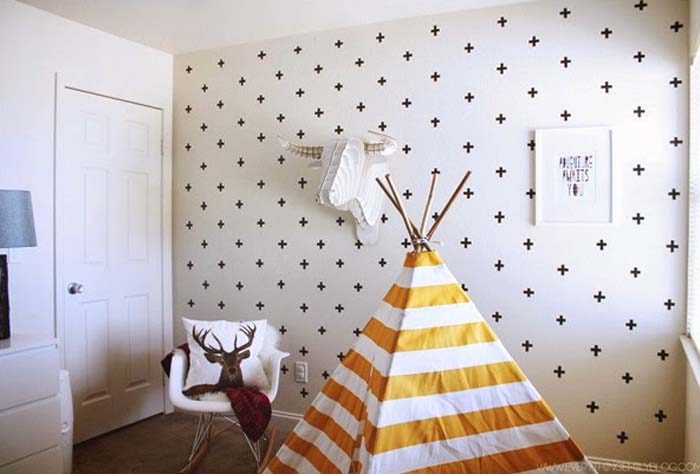
In most rented apartments, you can paint the walls, as long as you paint them back to white before you move out. That sounds like a whole lot of effort to me. Instead I’m going to opt for a less permanent accent wall and use decals or washi tape like Emily of Everything Emily did for her son’s room. Washi tape comes in so many colors, you could create endless patterns with it…and if you get bored, just create another one! Plus, she has a cool name, like me. Nice job, Emily.
Saturday, April 11th, 2015
Flash tattoos are officially a thing. They’ve been trendy ever since Beyonce made them cool at the end of last summer, and they’re all over Coachella at this very moment. I really love the idea of showing off a tattoo that I can wash off later, but I just can’t get behind the “festival wear” thing. Plus…and call me a hipster/snob if you want…if everyone’s doing something…that makes me want to do it less.
When I saw gorgeous photos of dried flower “tattoos” during a recent Pinterest binge, I knew I had found a flash tattoo inspired DIY I had to try. It was the perfect compromise of festival style, dainty elegance, and originality. My results were everything I had hoped for. Check out how I did it below and learn how to make temporary tattoos from dried flowers at home.
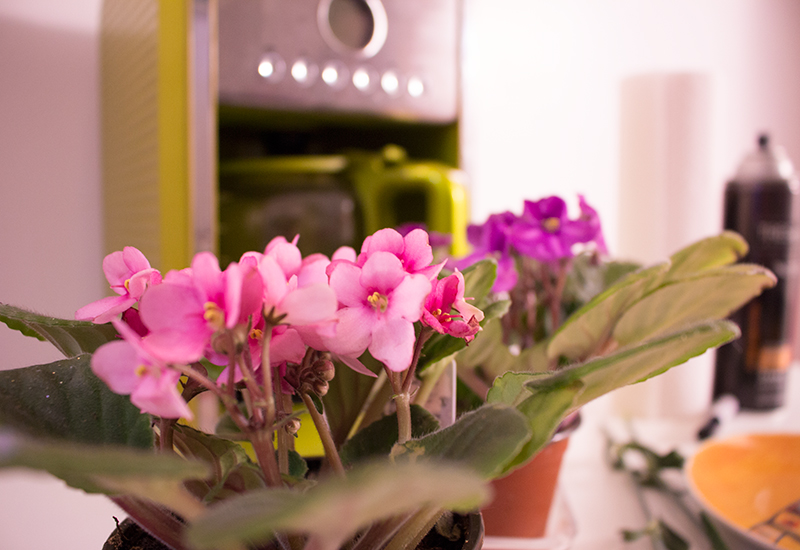
To start off, I headed to the florist. I bought two potted African violets: one with pink flowers and one with dark purple. I figured if I ever wanted to do this again, I’d have a tattoo tree ready for me in my kitchen. They were only $4 a piece. I don’t have much of a green thumb, but maybe I will miraculously keep them alive.
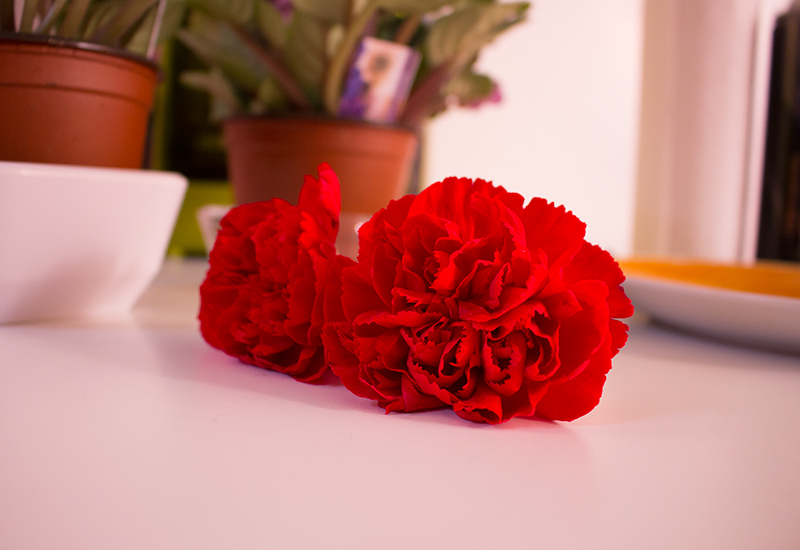
I also wanted some red in my fake tattoos, so I bought two red carnations. I ended up only using one of them for my arms. I felt pretty goofy buying flowers just so I could rip them apart, but, okay.
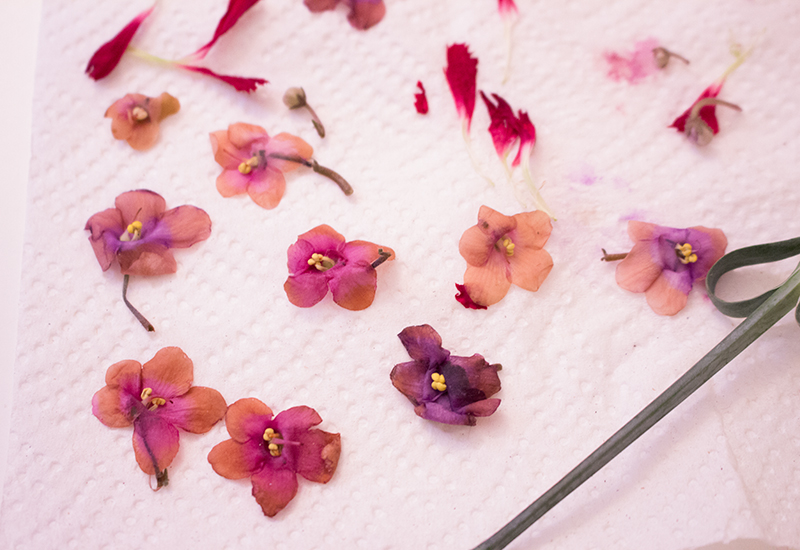
Pressing flowers the traditional way can take weeks. Instead of sticking my buds in a book and waiting, I dried them out in 30 seconds with a microwave. I put my flowers face down on a paper towel on top of a plate. Then I put another paper towel on top of the blossoms, and then pressed them down with another plate.

The carnations kept a lot more of their color during the drying process. The purple and pink flowers turned brown on the edges and looks a bit transparent. 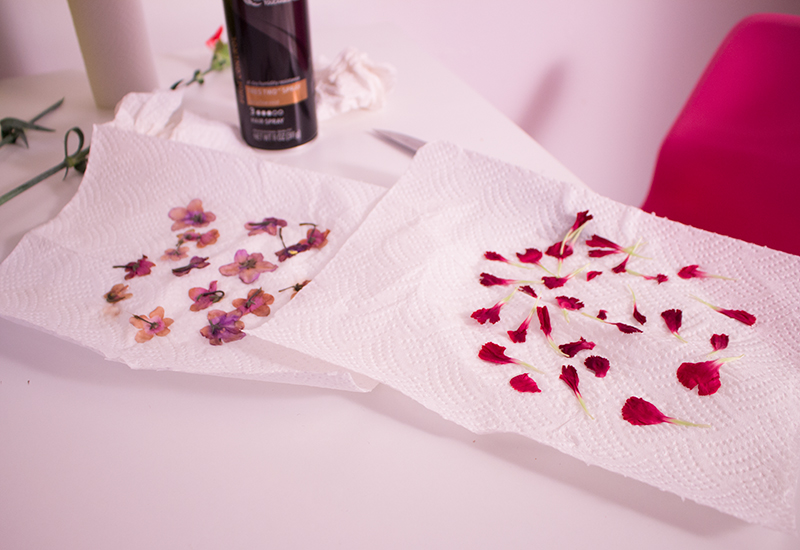
The petals on the carnations were much sturdier than the African violets. I thought it would be easier to let the violets dry a little bit on the paper towel before I pulled them off, (you know how things can be a little moist after you take them out of the microwave?) but that did not work. When using delicate flowers, the key is to take them off of the paper towels immediately, and transfer them right-side-up to a dry paper towel.
To adhere the flowers, I used brush-on eyelash glue. I painted a little bit on my skin and carefully patted the flower into place. On petals that didn’t quite stick, I used the eyelash glue like ModPodge and decoupaged them into place. After I finished my design, I sealed the flowers by spraying them with hairspray. Here’s how it finally turned out:
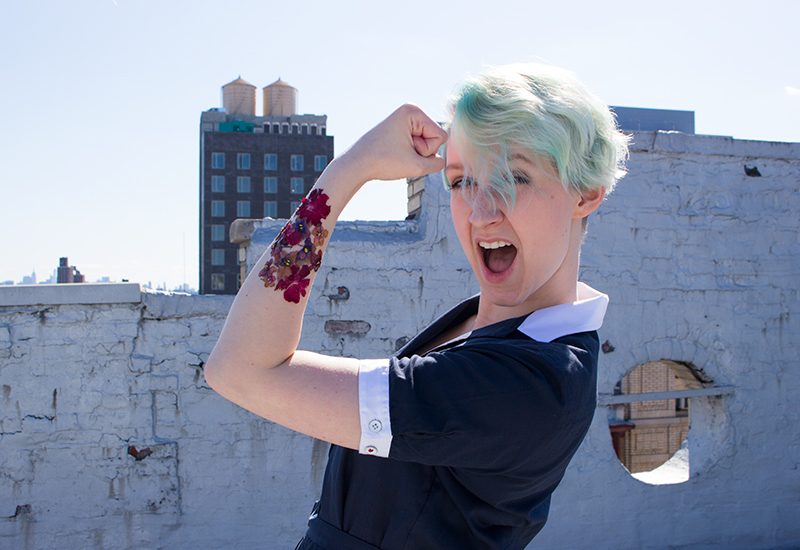
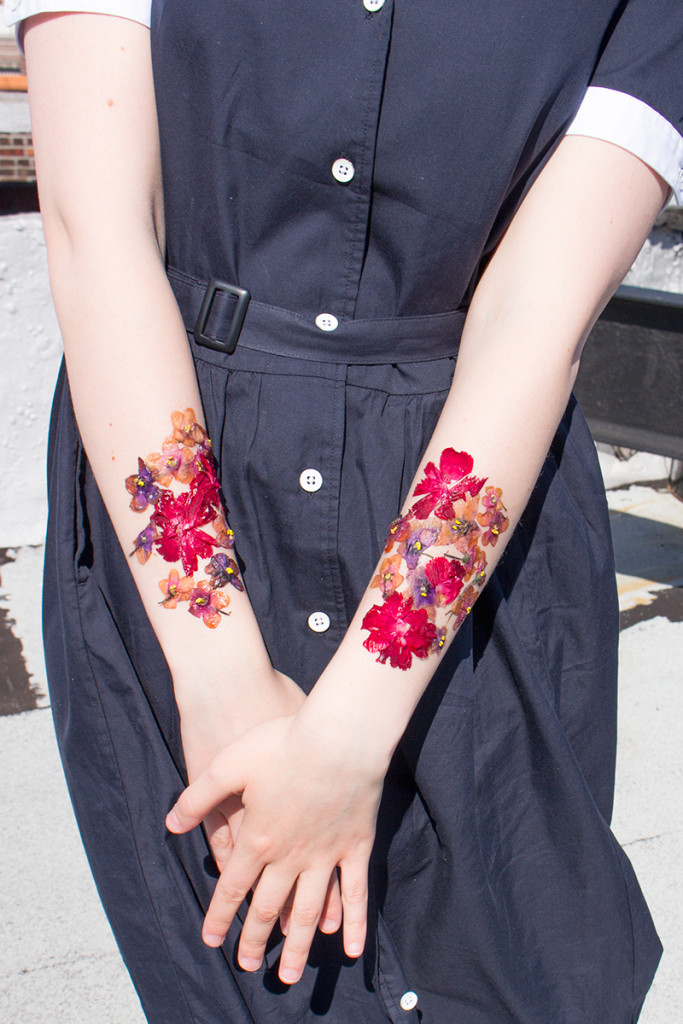
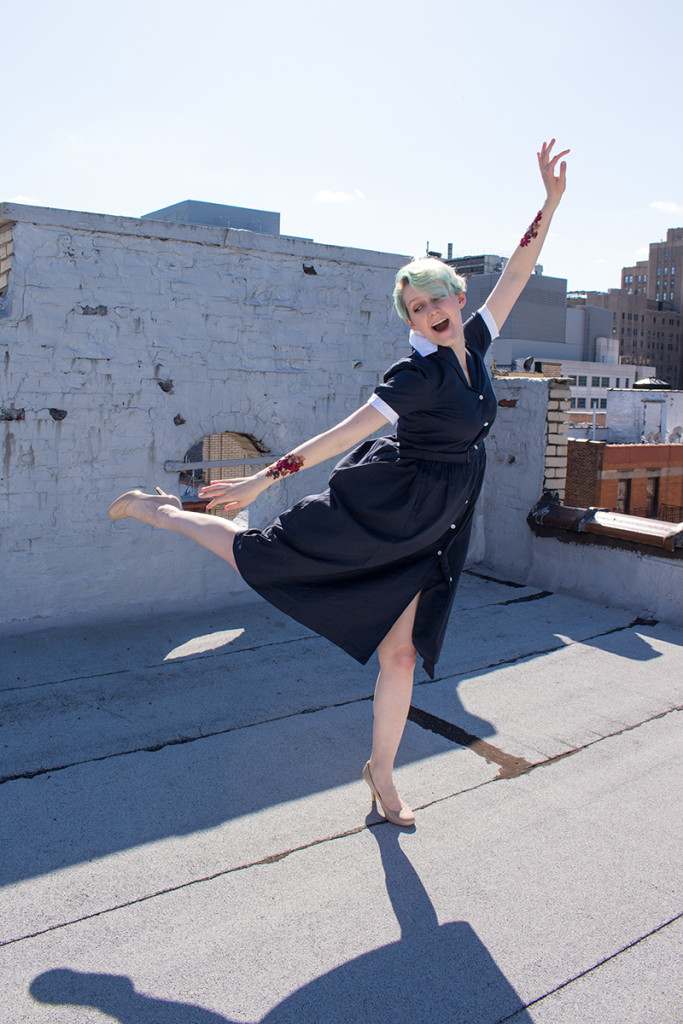
Even though the petals I used to make these tattoos were delicate, the finished product was anything but. They stayed on through wind, under my jacket, and took quite a bit of effort to eventually get off. If you don’t want to commit to having these glued on your arms all day, the tutorial that inspired my process suggests using vaseline to stick on the flowers. I for one will stick to eyelash glue for optimal durability. I’m looking forward to doing this again in the summer for outdoor parties, concerts, or days spent drinking cocktails in the sun.

Also, I am OBSESSED with this blue tea dress from Uniqlo’s Ines de La Fressange collection. I’d been eying it for awhile before purchasing, and it was definitely $50 well spent. It makes me feel like Audrey Hepburn…if Audrey Hepburn had mint green hair.
Friday, November 28th, 2014
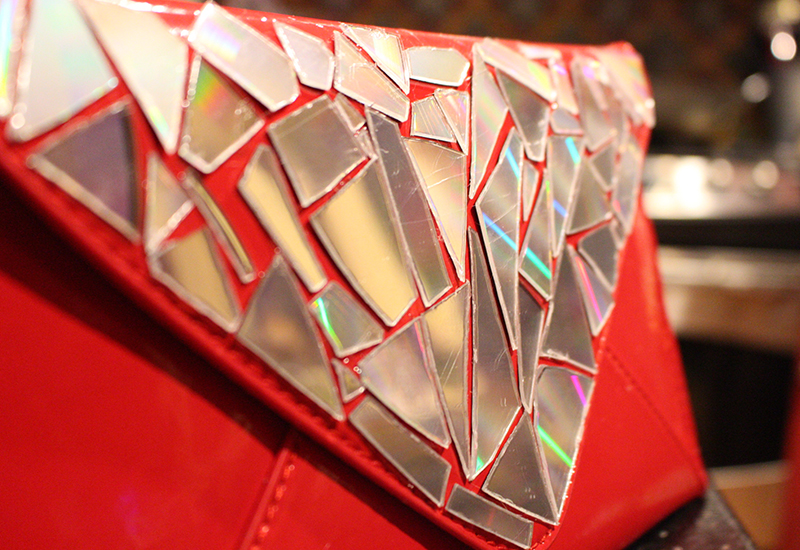
Jazz up a freebie makeup bag with a sparkly mosaic made of old CDs. SO JAZZY. All you need is a bag, super glue and some old CDs.
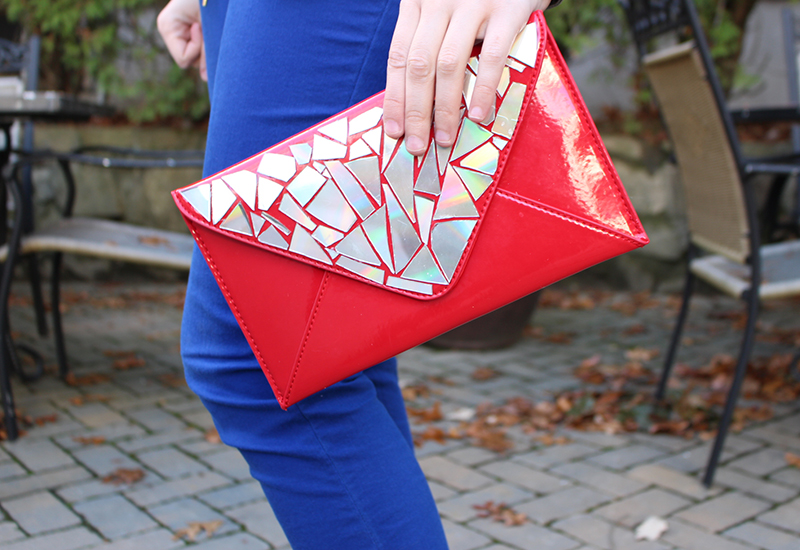
I found this red patent leather envelope clutch in the top of my closet. It appears to have come from a Clarin’s purchase with a free gift. I love the texture, but it needed a little personalization to really stand out.
In middle school I had a purse made of CD’s and duct tape. So using CDs as shiny mosaic pieces on the top flap felt very nostalgic and like, full circle or whatever. It also looks way cool and I spent a solid amount of time just staring at the finished product.
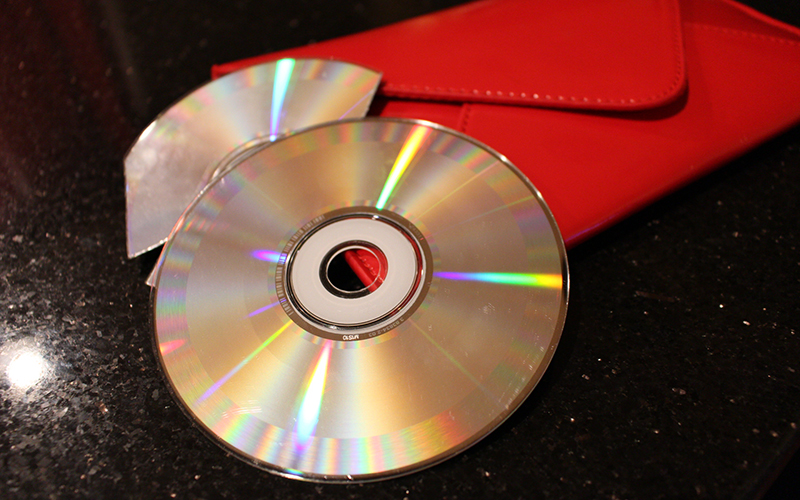
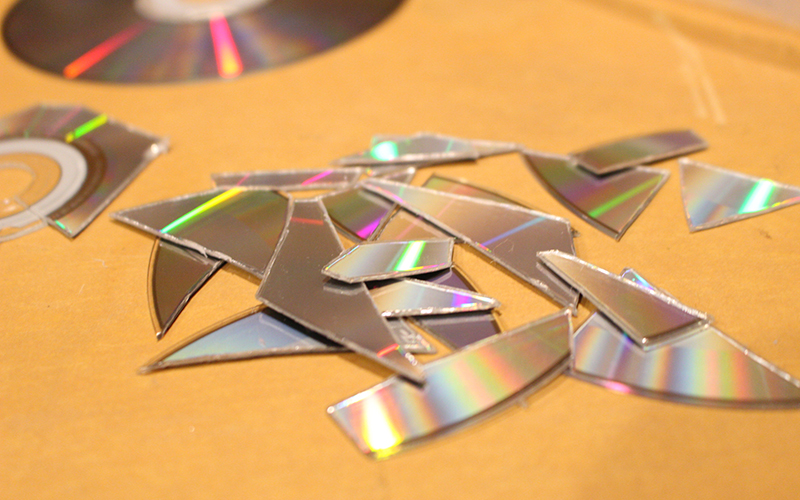
First, I cut up three CDs into pieces of varying sizes. Then I used super glue to attach them to the purse. The end. It was crazy easy.
In case you were wondering, the CDs used were Jessie Ware’s “Devotion,” because I got it for free when I worked at MTV, Death Cab For Cutie’s “Plans” and Gavin DeGraw’s self-titled album for obvious reasons.