Monday, June 22nd, 2015
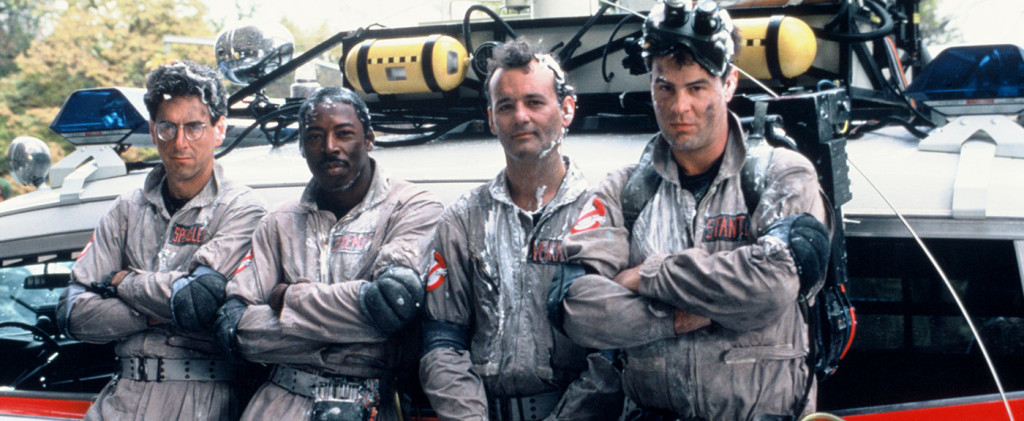
If you haven’t already heard that there’s going to be an all-female Ghostbusters remake, you’re living under a rock. The movie has an amazing cast, featuring arguably the most hilarious women on the planet. Last week, some of the first images from the set were released, and I was pumped to see one of my favorite female comedians, Kate McKinnon, in full spirit-stalking regalia. But after I let the look sink in for a minute, I thought…this is actually an awesome outfit, and I want to steal it.

First off, that leather jacket is on point. It definitely looks like it has a backstory. I’d like to think it came from a thrift store, or that her character found it in her grandpa’s attic. I recently found a similar one at Buffalo Exchange for a meer $20 by B.B. Dakota. It’s not quite as worn-in as Kate’s, but it’s still perfectly oversized and awesome.
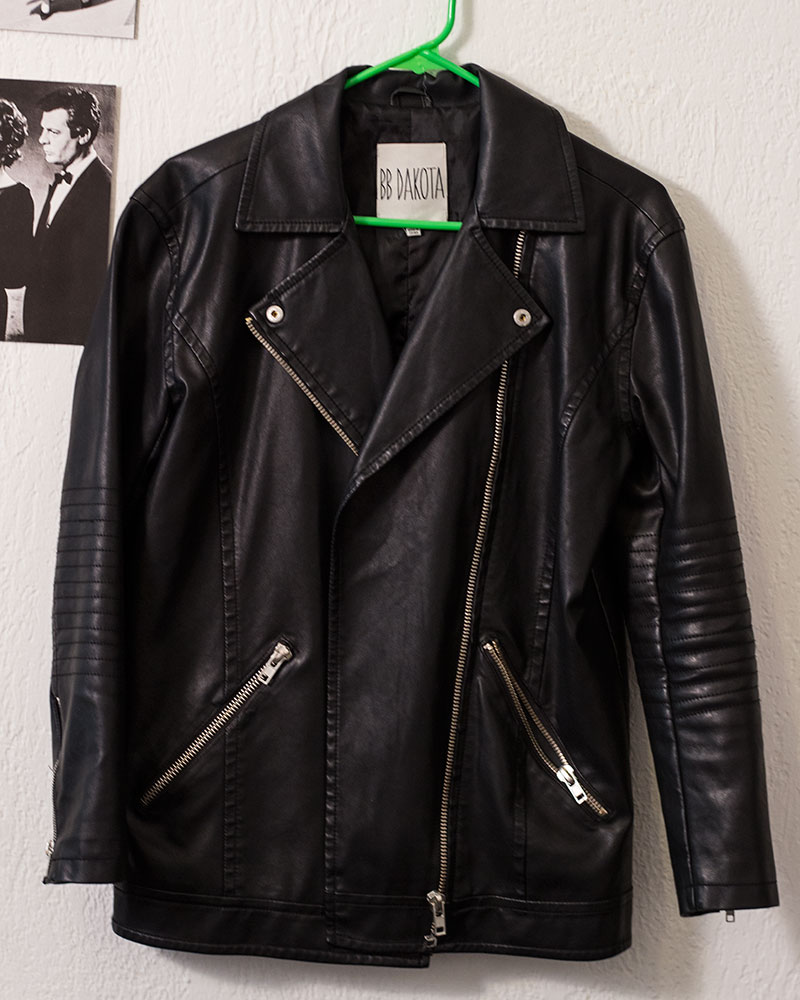
It’s hard to find on-trend leather jackets at thrift stores. But if you’re looking to buy one second hand, consignment stores like Crossroads Trading or Buffalo Exchange are your best bet. If you’re looking for something new, try the options under $100 below. If you buy the fringy one, please send me a photo so I can live vicariously through you.
Kate’s splatter-paint overalls reminded me that I’ve been DYING to make a cool pair of paint-covered boyfriend jeans. I’ve had this photo saved to my desktop for the past 4 months and haven’t gotten around to actually DIY-ing something similar.
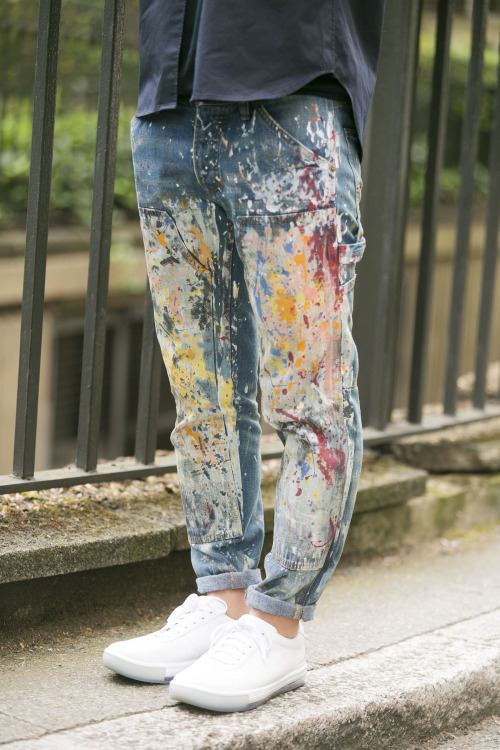
Making a pair of splatter-paint overalls is totally genius, and is more unique than the overdone boyfriend jeans trend. A lot of people are afraid to rock dungarees, so you can typically find a new pair of overalls on the clearance rack at most department stores.
I am ALL ABOUT the combat boots. Every winter, I buy a new pair of combat boots, and by April I’ve completely destroyed them. Since summer has finally arrived, I’m going to stock up on some cool, clearance combat boot styles while they’re cheap. All of these styles are under $50 at the moment (and I just ordered the Topshop pair):
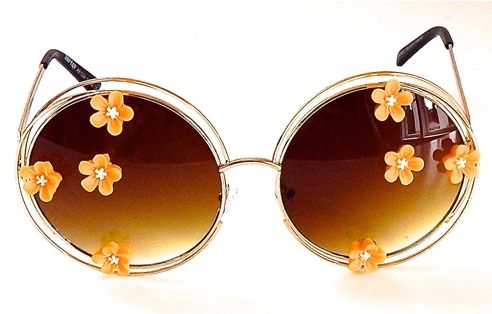
I can’t say I’d wear those ghost-busting yellow goggles on a daily basis, but I’d definitely wear these yellow-tinted Janis Joplin glasses from Gasoline Glamour. If embellishment isn’t your thing, any old pair of Lennon-style sunnies will do.
Throw all of these pieces on with a v-neck tee and you’ve got an epic, Ghostbusters inspired ensemble. I feel confident that this look is a big upgrade from the khaki jumpsuit.
Monday, May 25th, 2015
Every time I’ve moved into a new space, I have come up with many, many grandiose ideas for how to decorate. When I was a senior in high school dreaming about my college dorm room, I spent hours online deciding which posters I would buy. When I moved into my first apartment in college, I scoured thrift stores for diamond-in-the-rough furniture and tchotchkes. My current apartment, which is also my first New York City apartment, suffered from a lack of decor for a good long while, due to the stress of moving, running a blog, working for a demanding job, etc, etc. But now that I’m moving in with my favorite girl come September, I’m back on the DIY decorating Pinterest grind. FYI…I am going to make ALL OF THE THINGS. And you know there is going to be a blog post for each and every creation.
Although I can’t get my DIY decor on just yet, here are 10 quirky and colorful DIY projects I intend on eventually carrying out.
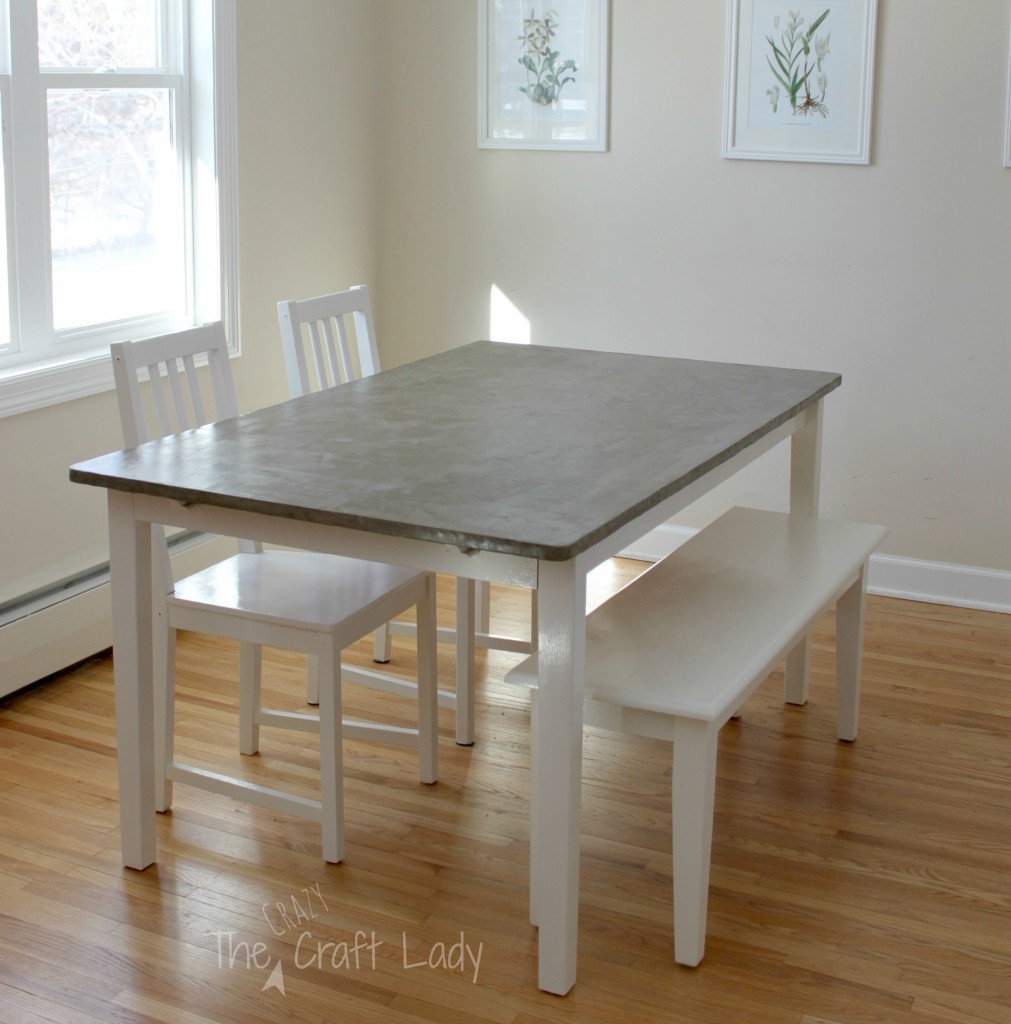
Incase you’re out of the loop when it comes to serious crafters, covering your tables in concrete is all the rage. It’s simple, it’s inexpensive, and it makes for a super sleek looking piece of furniture. Aimee of The Crazy Craft Lady covered her dining set in concrete, and I intend on following her instructions to revamp an unfinished wood end table I already have.
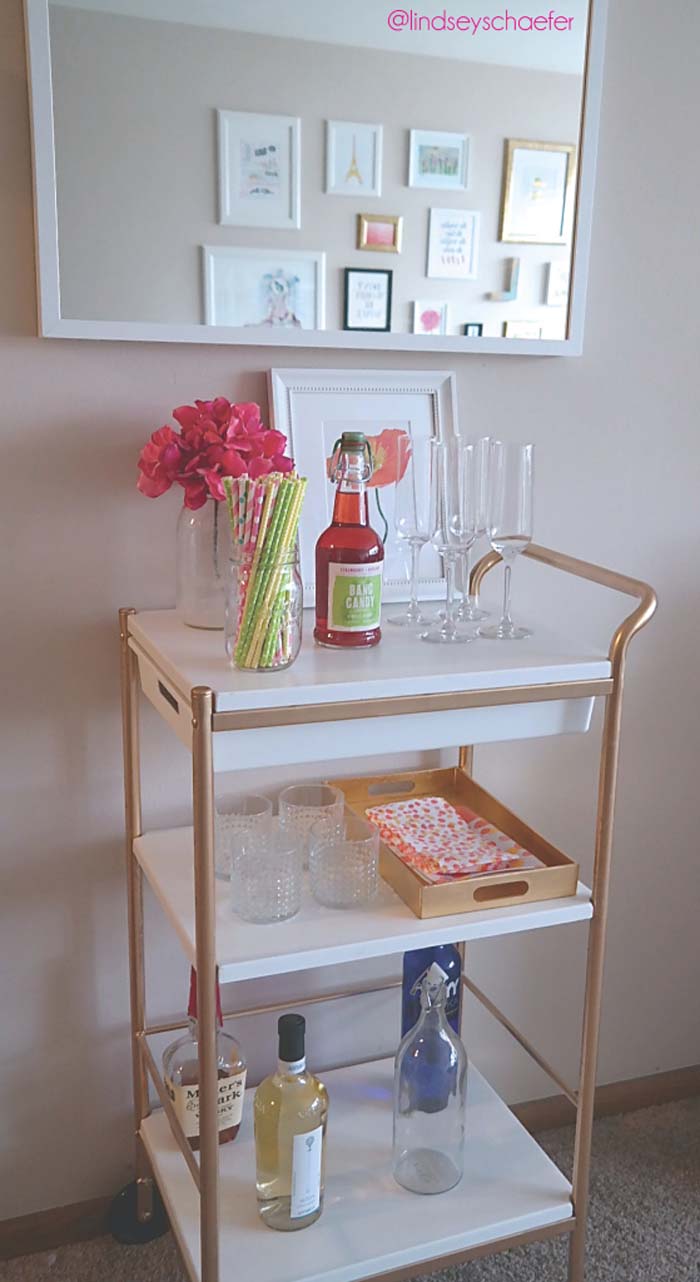
Because I intend on making my new apartment all kinds of grown-up sophisticated, I’m definitely turing this $30 Ikea utility cart into a retro-chic bar cart with some spray paint. At our housewarming party people are going to be like, “whoa. There is a bar cart in this apartment. That is some fancy shit.” You can check out the tutorial from Lindsey at The Curly Diaries.
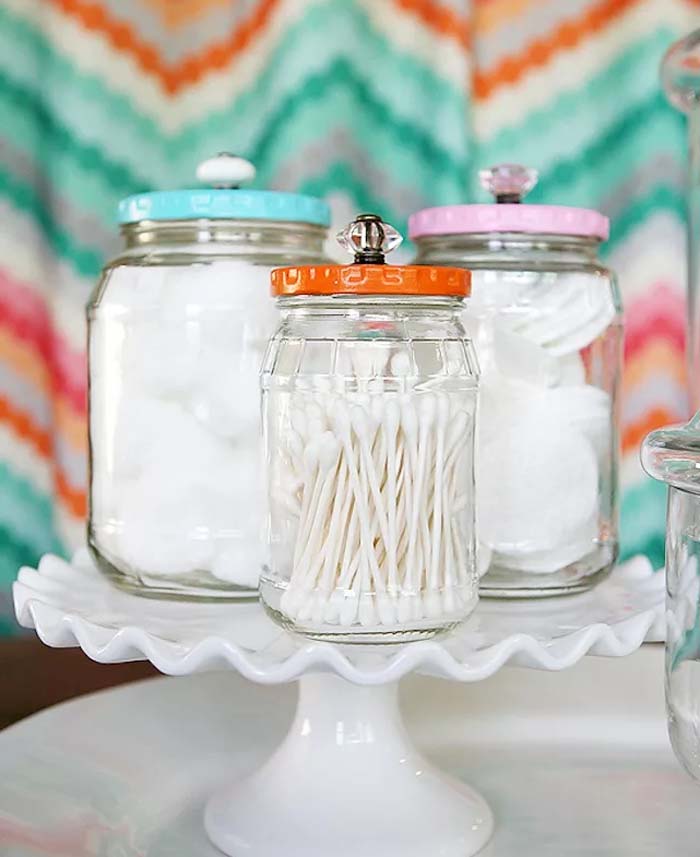
Starting now, I will be saving all of my glass jars and their lids. With a coat of rubber paint, hot glue, and a drawer pull, you can make old jars into apothecary-esque creations. The jars in this photo are used for bathroom supplies, but I’m going to use mine in the kitchen for salt, sugar, coffee, and spices.
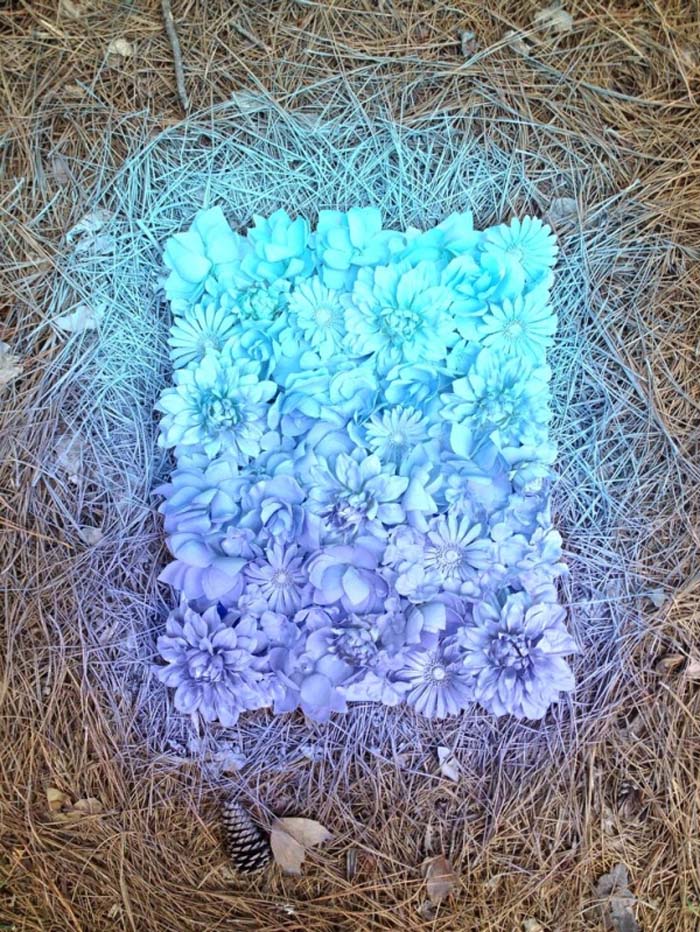
This photo doesn’t come with much of a tutorial, but it seems pretty self-explanatory. First, acquire a canvas and some fake flowers. Then, hot glue the fake flowers to the canvas. Then spray paint the shit out of it with some bright colored spray paint. Voila! It’s art. Put it in your entryway, you crafty bitch.
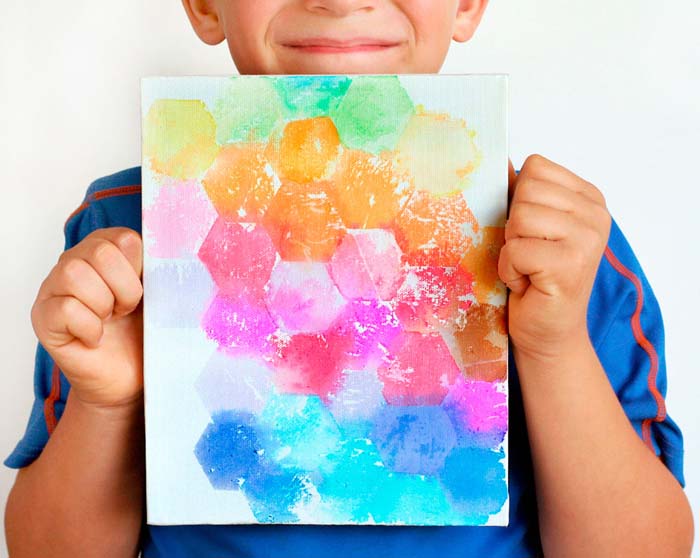
This idea from Fiskars is actually recommended for kid’s crafts, but I think it looks cool so I’m doing it for my grown-up apartment anyway. All you need is special bleeding tissue paper, which you can find at most craft stores, a white canvas and water. You cut shapes out of your tissue paper (or strips), wet the canvas, stick on your paper and then remove it after it sits overnight. So easy! So pretty! ONE-OF-A-KIND! My girlfriend claims she doesn’t like being crafty, but I am forcing her to do this with me.
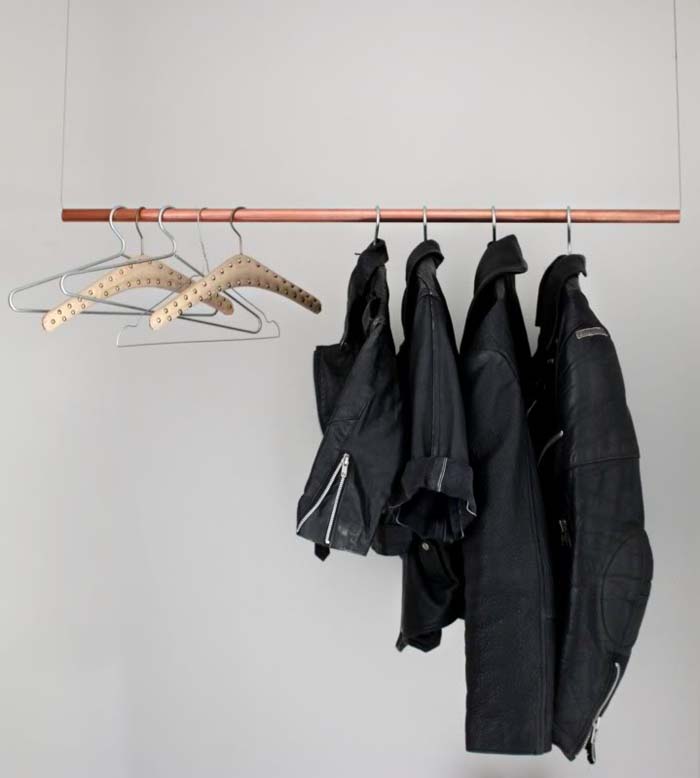
I already know that no matter how great of an apartment we end up in, there is not going to be enough closet space for two girls with a whole lot of clothing. Since I have a lot of vintage clothes I’d love to show off in a cool way, this DIY hanging coat/garment rack will be practical and sleek. The instructions are simple: get tube. Get wire cable. Get two hooks. Hang it. If you feel you need more detailed instructions, check out Love Aesthetics.
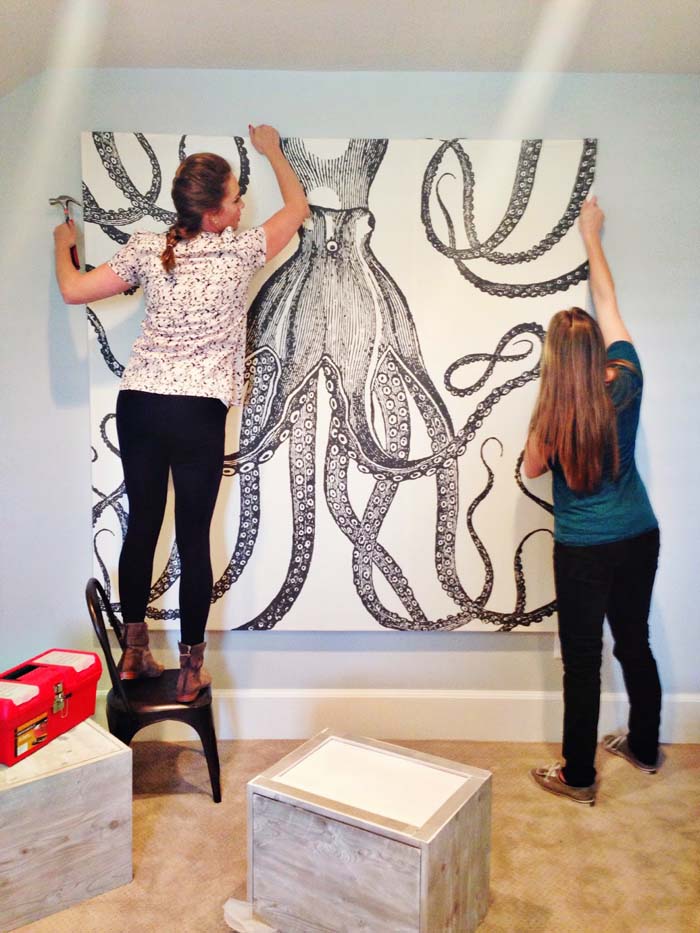
This giant piece of octopus art is actually a shower curtain, and this idea is absolutely genius. Big wall art is so expensive, but all you need to make your own is a shower curtain and some plywood boards from Home Depot. Kirsten over at 6th Street Design School says this project only took her and hour of work. I say YAAAAAAAS to everything about it.
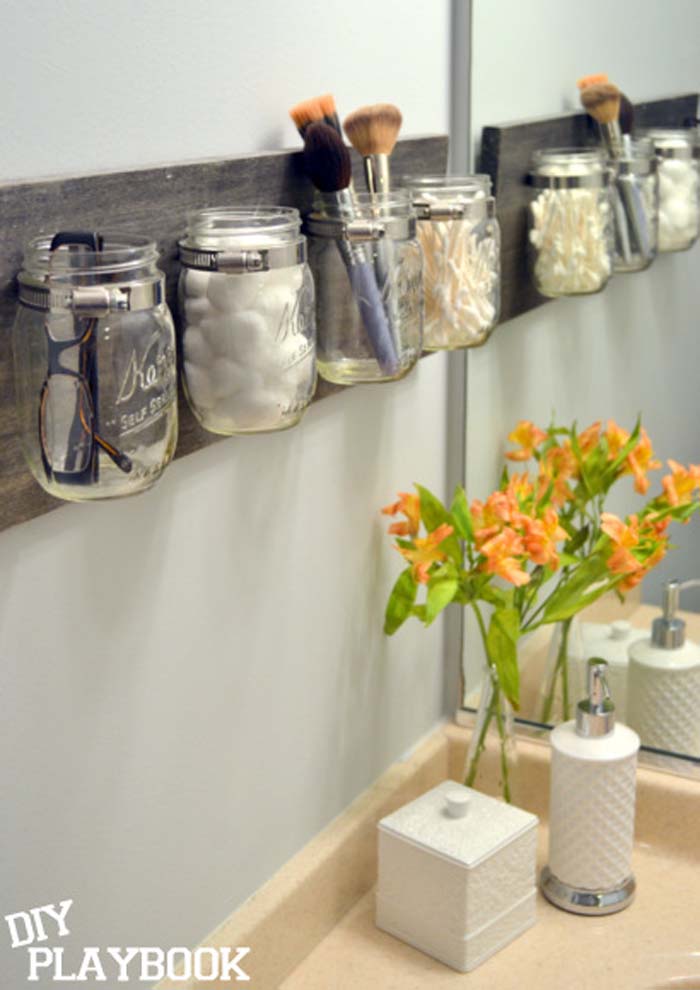
Not only will we have a fuck ton of clothes in our new apartment, we’re also going to have a whole lot of makeup. This mason jar bathroom organizer is not only easy to make, but it will also be easy to clean with a quick swipe of a Clorox wipe. You can read the whole tutorial over on The DIY Playbook.
I’m not sure how I feel about using Christmas lights for this project, but I’m thinking I’ll use wiry string lights like these instead. I’ll also paint the hula hoop gold and use gold wire to hang it from the ceiling instead of lace like Sarah from Sarah With An H did. I’d rather have a sleek chandelier than a shabby-chic one, but to each their own.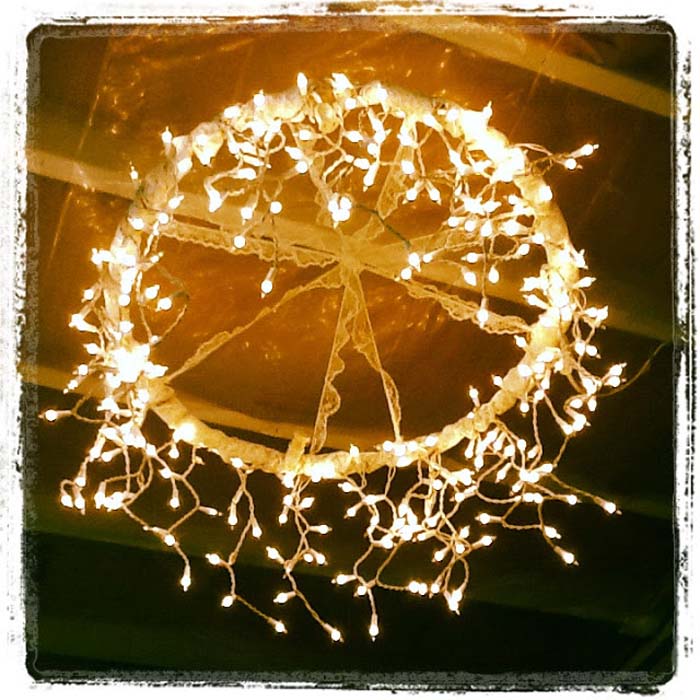
In most rented apartments, you can paint the walls, as long as you paint them back to white before you move out. That sounds like a whole lot of effort to me. Instead I’m going to opt for a less permanent accent wall and use decals or washi tape like Emily of Everything Emily did for her son’s room. Washi tape comes in so many colors, you could create endless patterns with it…and if you get bored, just create another one! Plus, she has a cool name, like me. Nice job, Emily.
Saturday, April 11th, 2015
Flash tattoos are officially a thing. They’ve been trendy ever since Beyonce made them cool at the end of last summer, and they’re all over Coachella at this very moment. I really love the idea of showing off a tattoo that I can wash off later, but I just can’t get behind the “festival wear” thing. Plus…and call me a hipster/snob if you want…if everyone’s doing something…that makes me want to do it less.
When I saw gorgeous photos of dried flower “tattoos” during a recent Pinterest binge, I knew I had found a flash tattoo inspired DIY I had to try. It was the perfect compromise of festival style, dainty elegance, and originality. My results were everything I had hoped for. Check out how I did it below and learn how to make temporary tattoos from dried flowers at home.
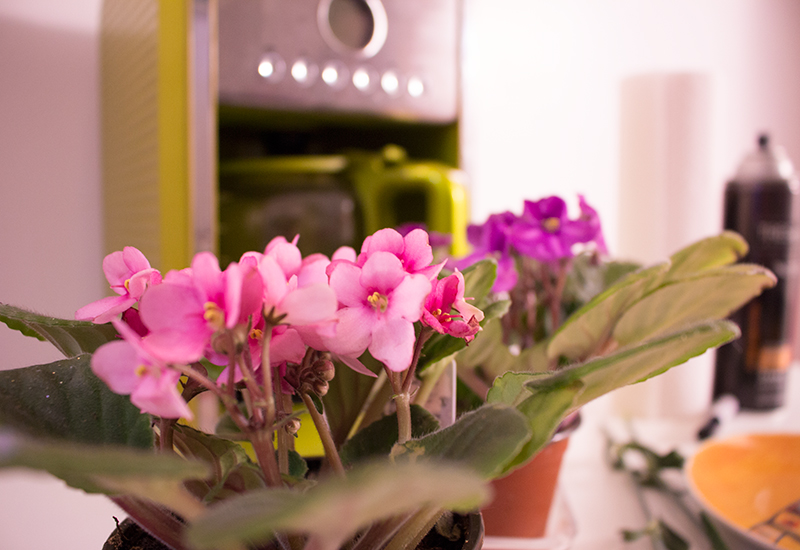
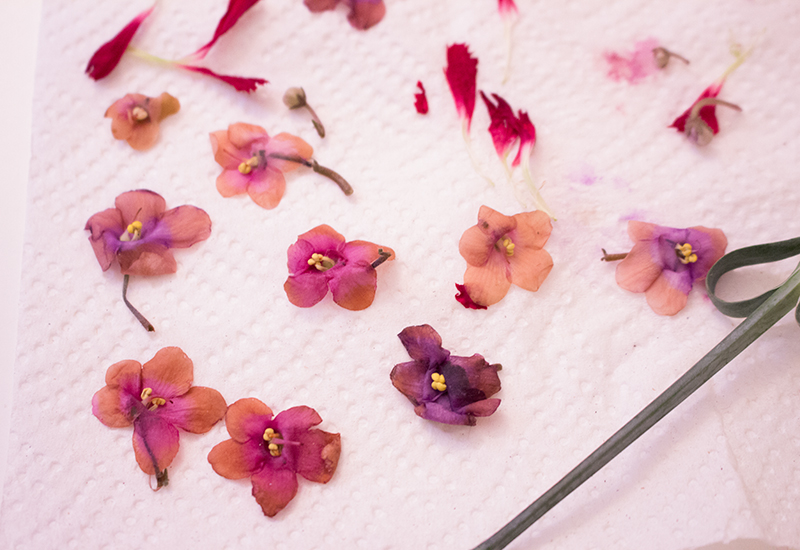
To start off, I headed to the florist. I bought two potted African violets: one with pink flowers and one with dark purple. I figured if I ever wanted to do this again, I’d have a tattoo tree ready for me in my kitchen. They were only $4 a piece. I don’t have much of a green thumb, but maybe I will miraculously keep them alive.
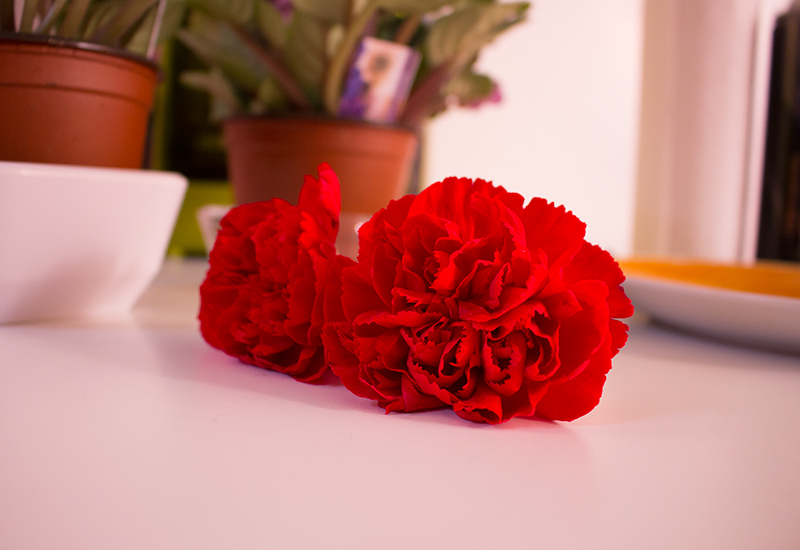
I also wanted some red in my fake tattoos, so I bought two red carnations. I ended up only using one of them for my arms. I felt pretty goofy buying flowers just so I could rip them apart, but, okay.
Pressing flowers the traditional way can take weeks. Instead of sticking my buds in a book and waiting, I dried them out in 30 seconds with a microwave. I put my flowers face down on a paper towel on top of a plate. Then I put another paper towel on top of the blossoms, and then pressed them down with another plate.

The carnations kept a lot more of their color during the drying process. The purple and pink flowers turned brown on the edges and looks a bit transparent. 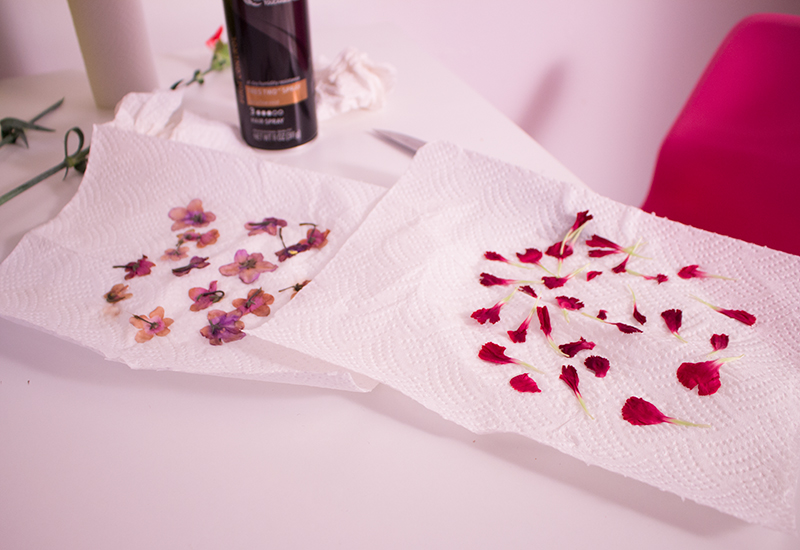
The petals on the carnations were much sturdier than the African violets. I thought it would be easier to let the violets dry a little bit on the paper towel before I pulled them off, (you know how things can be a little moist after you take them out of the microwave?) but that did not work. When using delicate flowers, the key is to take them off of the paper towels immediately, and transfer them right-side-up to a dry paper towel.
To adhere the flowers, I used brush-on eyelash glue. I painted a little bit on my skin and carefully patted the flower into place. On petals that didn’t quite stick, I used the eyelash glue like ModPodge and decoupaged them into place. After I finished my design, I sealed the flowers by spraying them with hairspray. Here’s how it finally turned out:
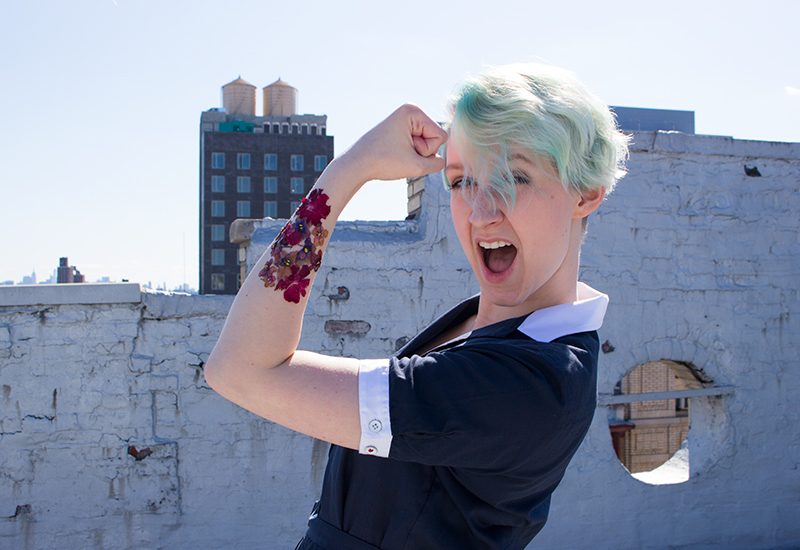
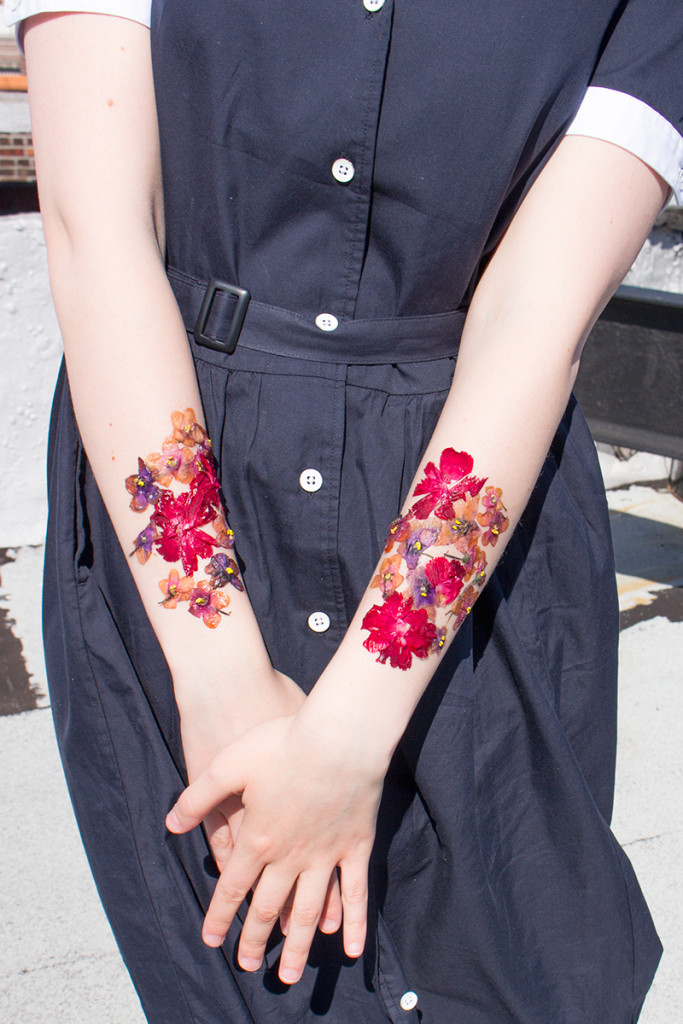
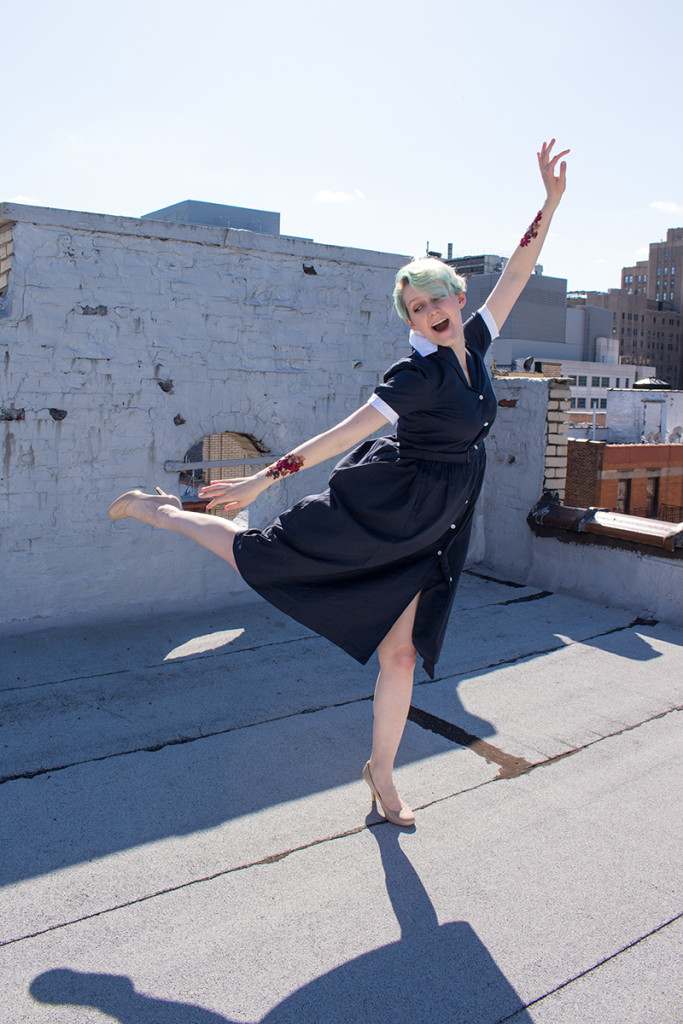
Even though the petals I used to make these tattoos were delicate, the finished product was anything but. They stayed on through wind, under my jacket, and took quite a bit of effort to eventually get off. If you don’t want to commit to having these glued on your arms all day, the tutorial that inspired my process suggests using vaseline to stick on the flowers. I for one will stick to eyelash glue for optimal durability. I’m looking forward to doing this again in the summer for outdoor parties, concerts, or days spent drinking cocktails in the sun.

Also, I am OBSESSED with this blue tea dress from Uniqlo’s Ines de La Fressange collection. I’d been eying it for awhile before purchasing, and it was definitely $50 well spent. It makes me feel like Audrey Hepburn…if Audrey Hepburn had mint green hair.
Friday, November 28th, 2014
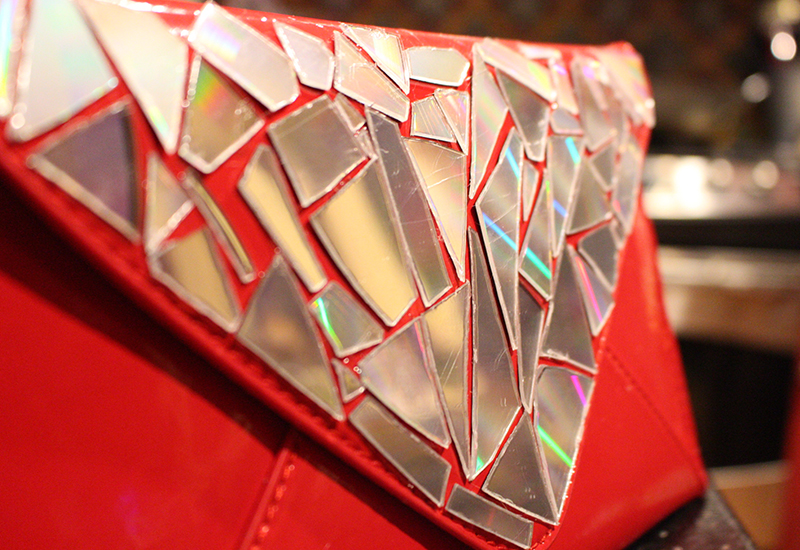
Jazz up a freebie makeup bag with a sparkly mosaic made of old CDs. SO JAZZY. All you need is a bag, super glue and some old CDs.
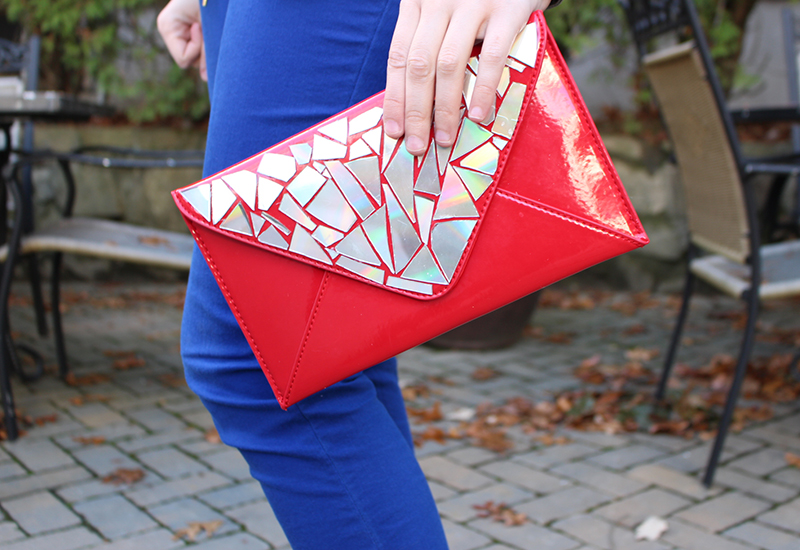
I found this red patent leather envelope clutch in the top of my closet. It appears to have come from a Clarin’s purchase with a free gift. I love the texture, but it needed a little personalization to really stand out.
In middle school I had a purse made of CD’s and duct tape. So using CDs as shiny mosaic pieces on the top flap felt very nostalgic and like, full circle or whatever. It also looks way cool and I spent a solid amount of time just staring at the finished product.
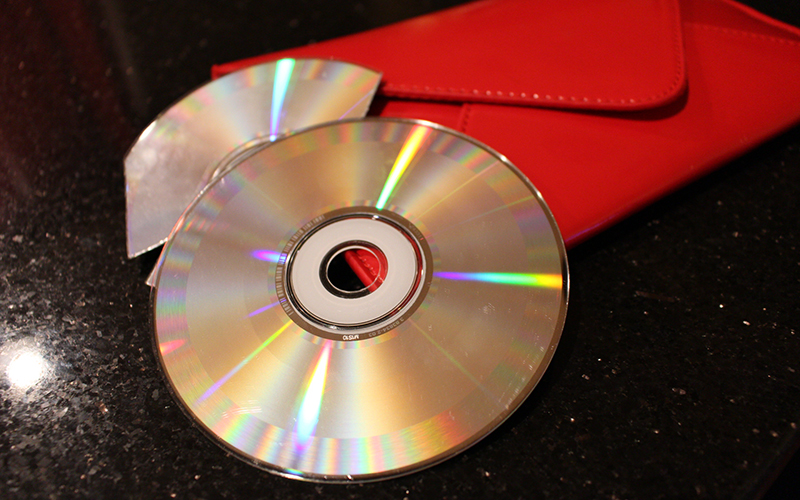
First, I cut up three CDs into pieces of varying sizes. Then I used super glue to attach them to the purse. The end. It was crazy easy.
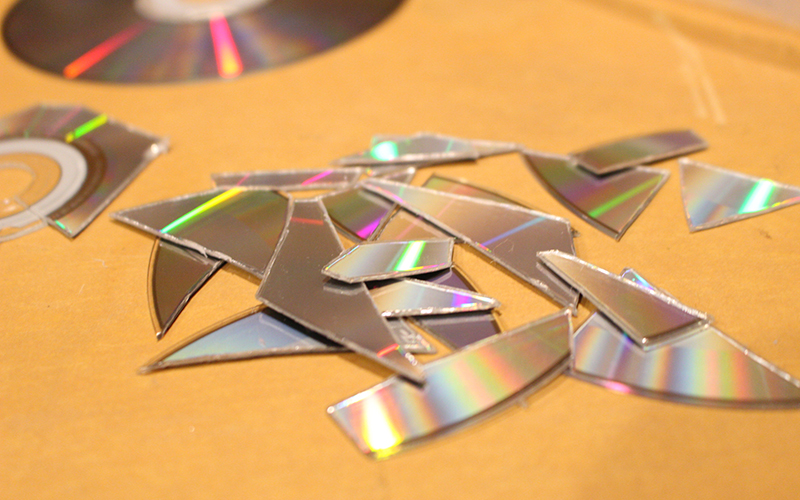
In case you were wondering, the CDs used were Jessie Ware’s “Devotion,” because I got it for free when I worked at MTV, Death Cab For Cutie’s “Plans” and Gavin DeGraw’s self-titled album for obvious reasons.
Tuesday, October 28th, 2014
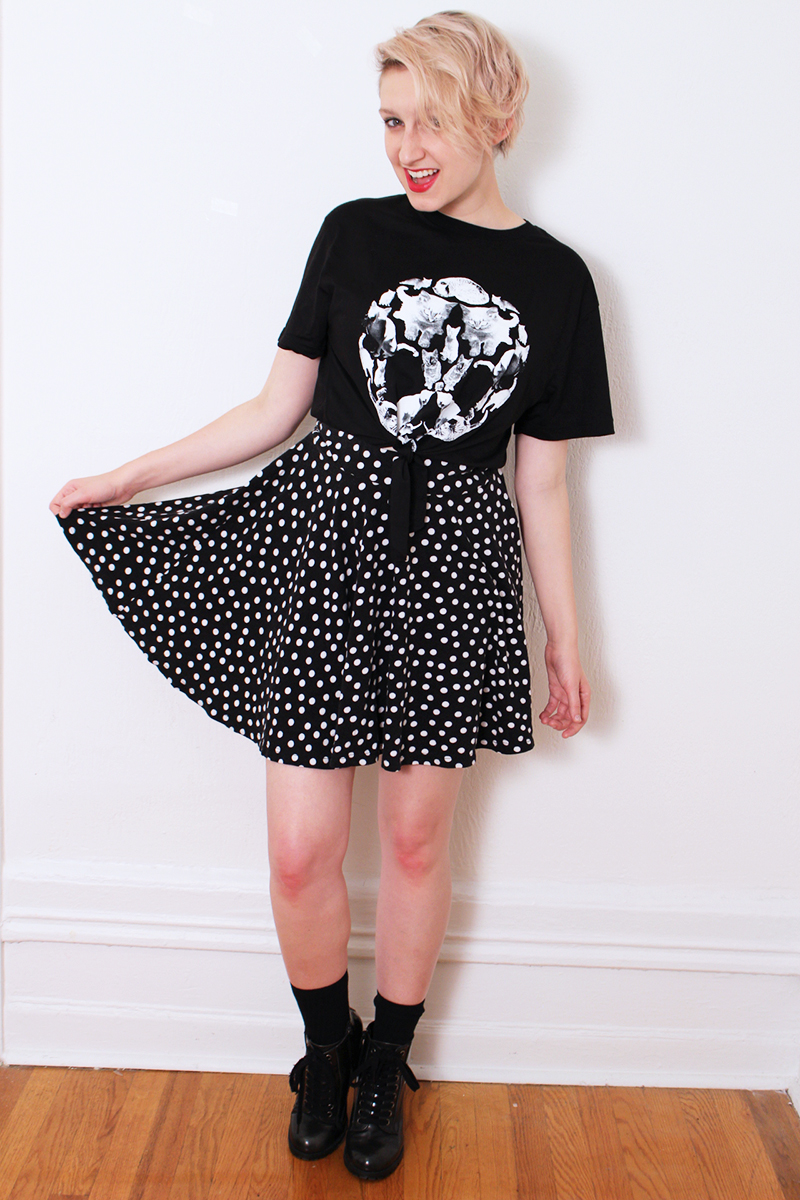
Literally every single t-shirt, no-sew DIY on the internet is a crop top. This one isn’t. It can be if you want it to be! But…I mean it’s almost November. Do you live in Florida or L.A.? Then you’re allowed to make it a crop top. If not, that’s just silly. This is my blog so what I say goes.
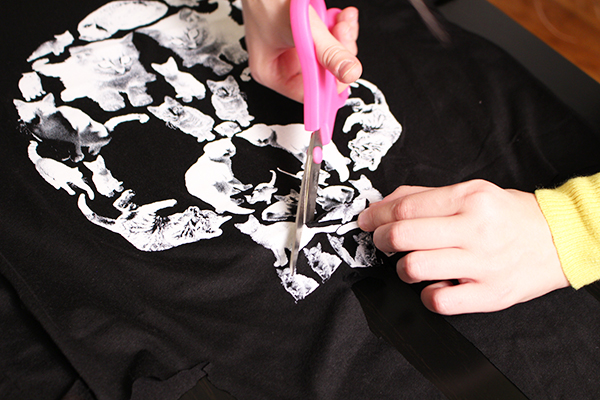
A few days ago my lovely roommate Kristen, who subscribes to Loot Crate, gave me this Halloween, unisex graphic t-shirt with a skull on it. But when you look closer, THE SKULL IS MADE OF PICTURES OF CATS! Mind blown. Kristen knew I love me some cat t-shirts and handed it over.
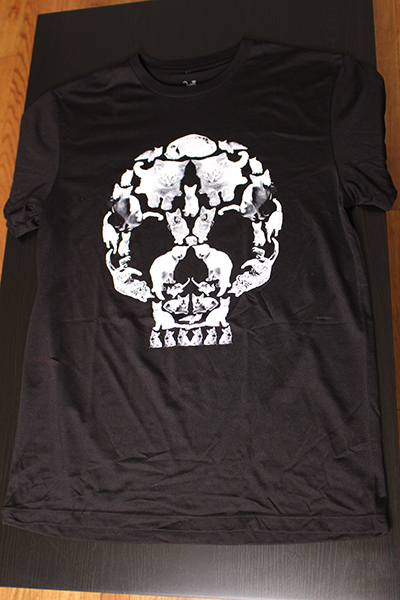
The shirt was a little bit big, so I scoured the internet for an easy way to make it look sleek that required no sewing. And when I think “sleek,” I don’t think t-shirt with the sleeves and bottom portion cut off. So a surfer-girl, sixteen-year-old-with-the-abs-of-a-spartan-boy crop top wasn’t going to fly.
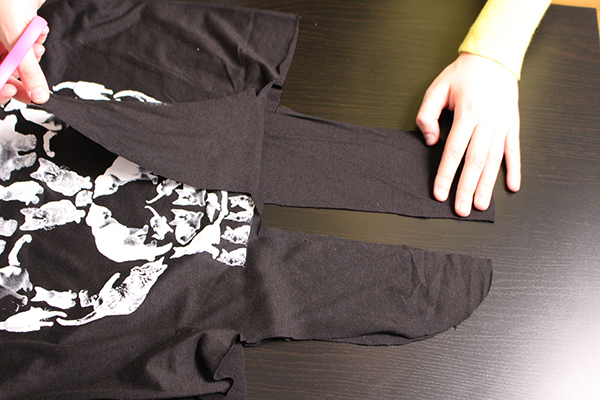
So here’s how I created a tie-front, regular ol’ length top our of a baggy unisex t-shirt. I slightly modified this tutorial, so thanks for helping me out.
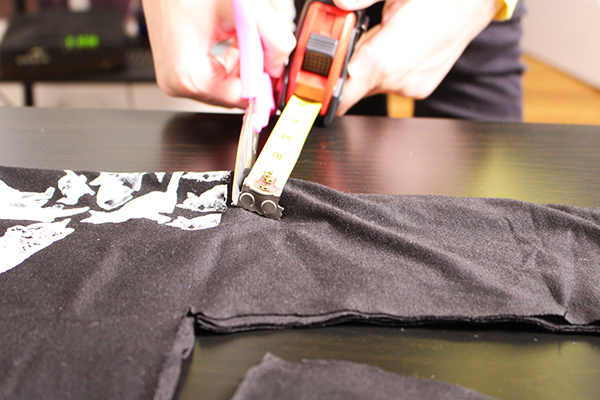
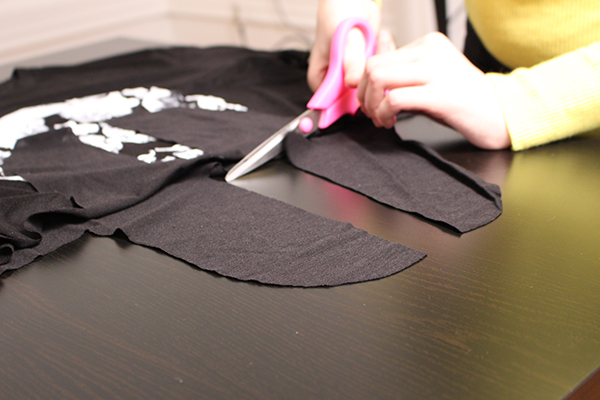
 I folded the shirt in half and measured five inches away from the fold.
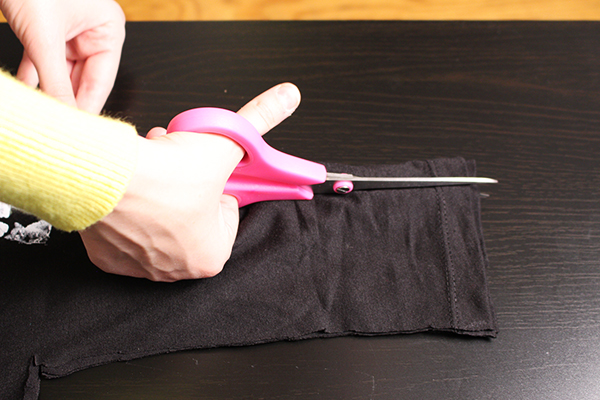
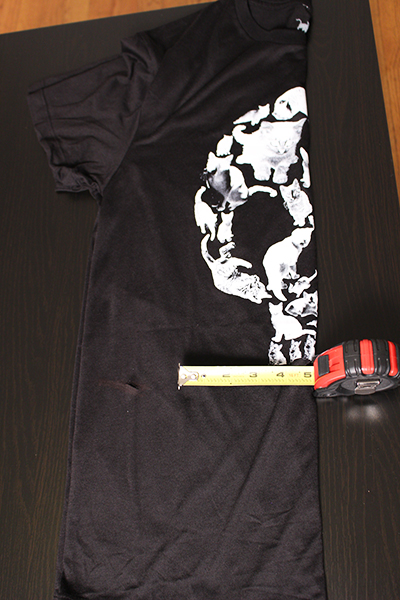 I cut the t-shirt bottom off, until I hit the end of my measuring tape.
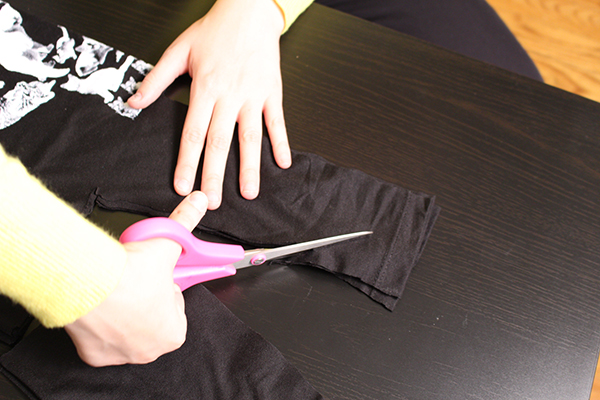
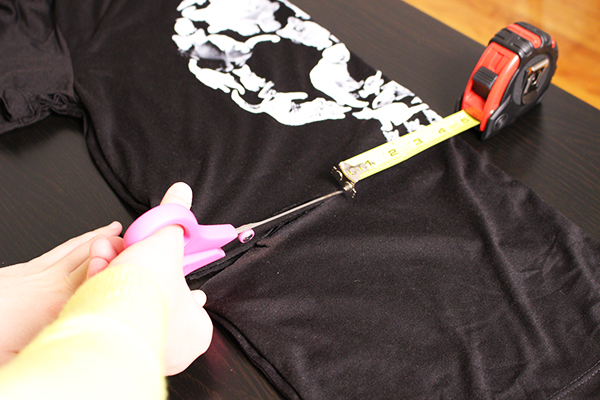 Then I cut down, towards the bottom of the shirt in a straight line from the end point of my first cut.